🏗️ Building the project
Forking the Project
The first step to take before you start contributing to this project is to Fork the project.
To fork the project, click on the Fork button on the top right corner of the repository page.
Cloning the Project
Once you have forked the project, you can clone it to your local machine.
To clone the project, you can use the git clone command.
Run the following command if you want to clone using SSH:
> git clone git@github.com:[your-username]/boyka-framework.git
Run the following command if you want to clone using HTTPS:
> git clone https://github.com/[your-username]/boyka-framework.git
Run the following command if you want to clone using Github CLI:
> git clone gh repo clone [your-username]/boyka-framework
The above URLs for SSH, HTTPS and Github CLI can be found on the github repo main page as well.
Creating a new branch
Once you have cloned the project, you can create a new branch to work on.
To create a new branch, run the following command:
> git switch -c [branch-name]
Replace [branch-name] with the name of the branch you want to create.
Setting up the project
To build the project, pnpm is required to be installed on your machine.
On Mac OS, run the following command:
> brew install pnpm
On Windows and Linux, you can run the following command:
> npm install -g pnpm
Once the installation is complete you can check by running the following command to verify that pnpm was installed correctly on your machine:
> pnpm --version
Now, execute the following command to set up the project:
> cd boyka-framework
> pnpm i
This step is mandatory before you start contributing to the project, because it will setup pre-commit hooks to automatically run the lint checks and test coverage check for the code before you can commit.
Core framework project
The core framework project is located in core-java/ directory.
Install Maven
Maven is the build tool we would be using for this project. So need to have Maven installed on your machine before you proceed to build the project.
Minimum version for Maven 3.9.0 is required, else, project will not build
In case Maven is not installed on your machine, the following steps should help.
Installing Maven on Windows
- Download the Maven Zip File from the maven download page and extract it.
- Add
MAVEN_HOMESystem Variable.- Open the Start menu and search for environment variables. Click on the Edit System environment variables result.
- Under the Advanced tab in the System Properties window, click Environment Variables.

- Click the New button under the System variables section to add a new system environment variable.
- Enter
MAVEN_HOMEas the variable name and the path to the Maven directory as the variable value. Click OK to save the new system variable.
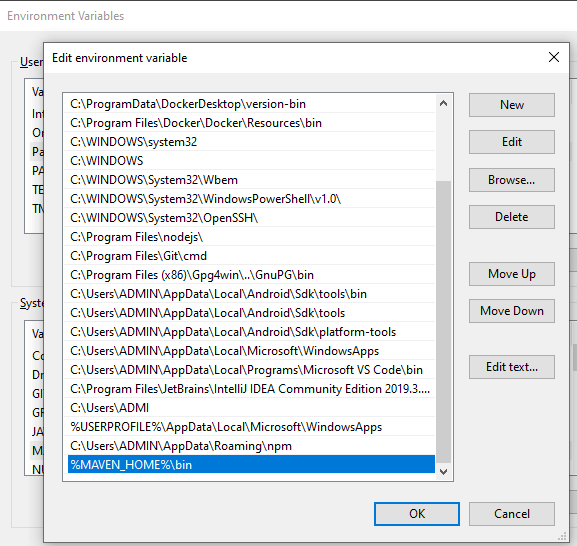
- Add
MAVEN_HOMEdirectory in the PATH Variable.- Select the Path variable under the System variables section in the Environment Variables window. Click the Edit button to edit the variable.
- Click the New button in the Edit environment variable window.

- Enter
%MAVEN_HOME%\binin the new field. Click OK to save changes to the Path variable. - Click OK in the Environment Variables window to save the changes to the system variables.
- Verify if Maven is installed correctly.
- Open Command Prompt and run the command:
mvn -v - It should display the Maven version as shown in the screenshot below:

- Open Command Prompt and run the command:
Installing Maven on MacOS
Installation of Maven on a Mac machine can be easily done using the Homebrew package manager.
After installing Homebrew, just run the command brew install maven, and it will install Maven within seconds on your machine, and you could straight away start using maven.
Build the Core project
Once Maven installation is complete, from the root repository directory, run the following command:
> mvn install -f core-java/pom.xml -DskipTests
This will resolve the dependencies and run check-style check for the project without actually running the tests.
Documentation project
The documentation project is located in website/ directory.
Install Node >= v18.20.3
- Install NVM (Node Version Manager) on your machine.
- Open your terminal or command prompt and run the following command:
curl -o- https://raw.githubusercontent.com/nvm-sh/nvm/v0.39.1/install.sh | bash - Run the following command to set up the project:
nvm install lts/hydrogen - Verify if Node is installed correctly.
- Open Command Prompt and run the command:
nvm -vandnode -v - It should display the NVM and Node version as shown in the screenshot below:
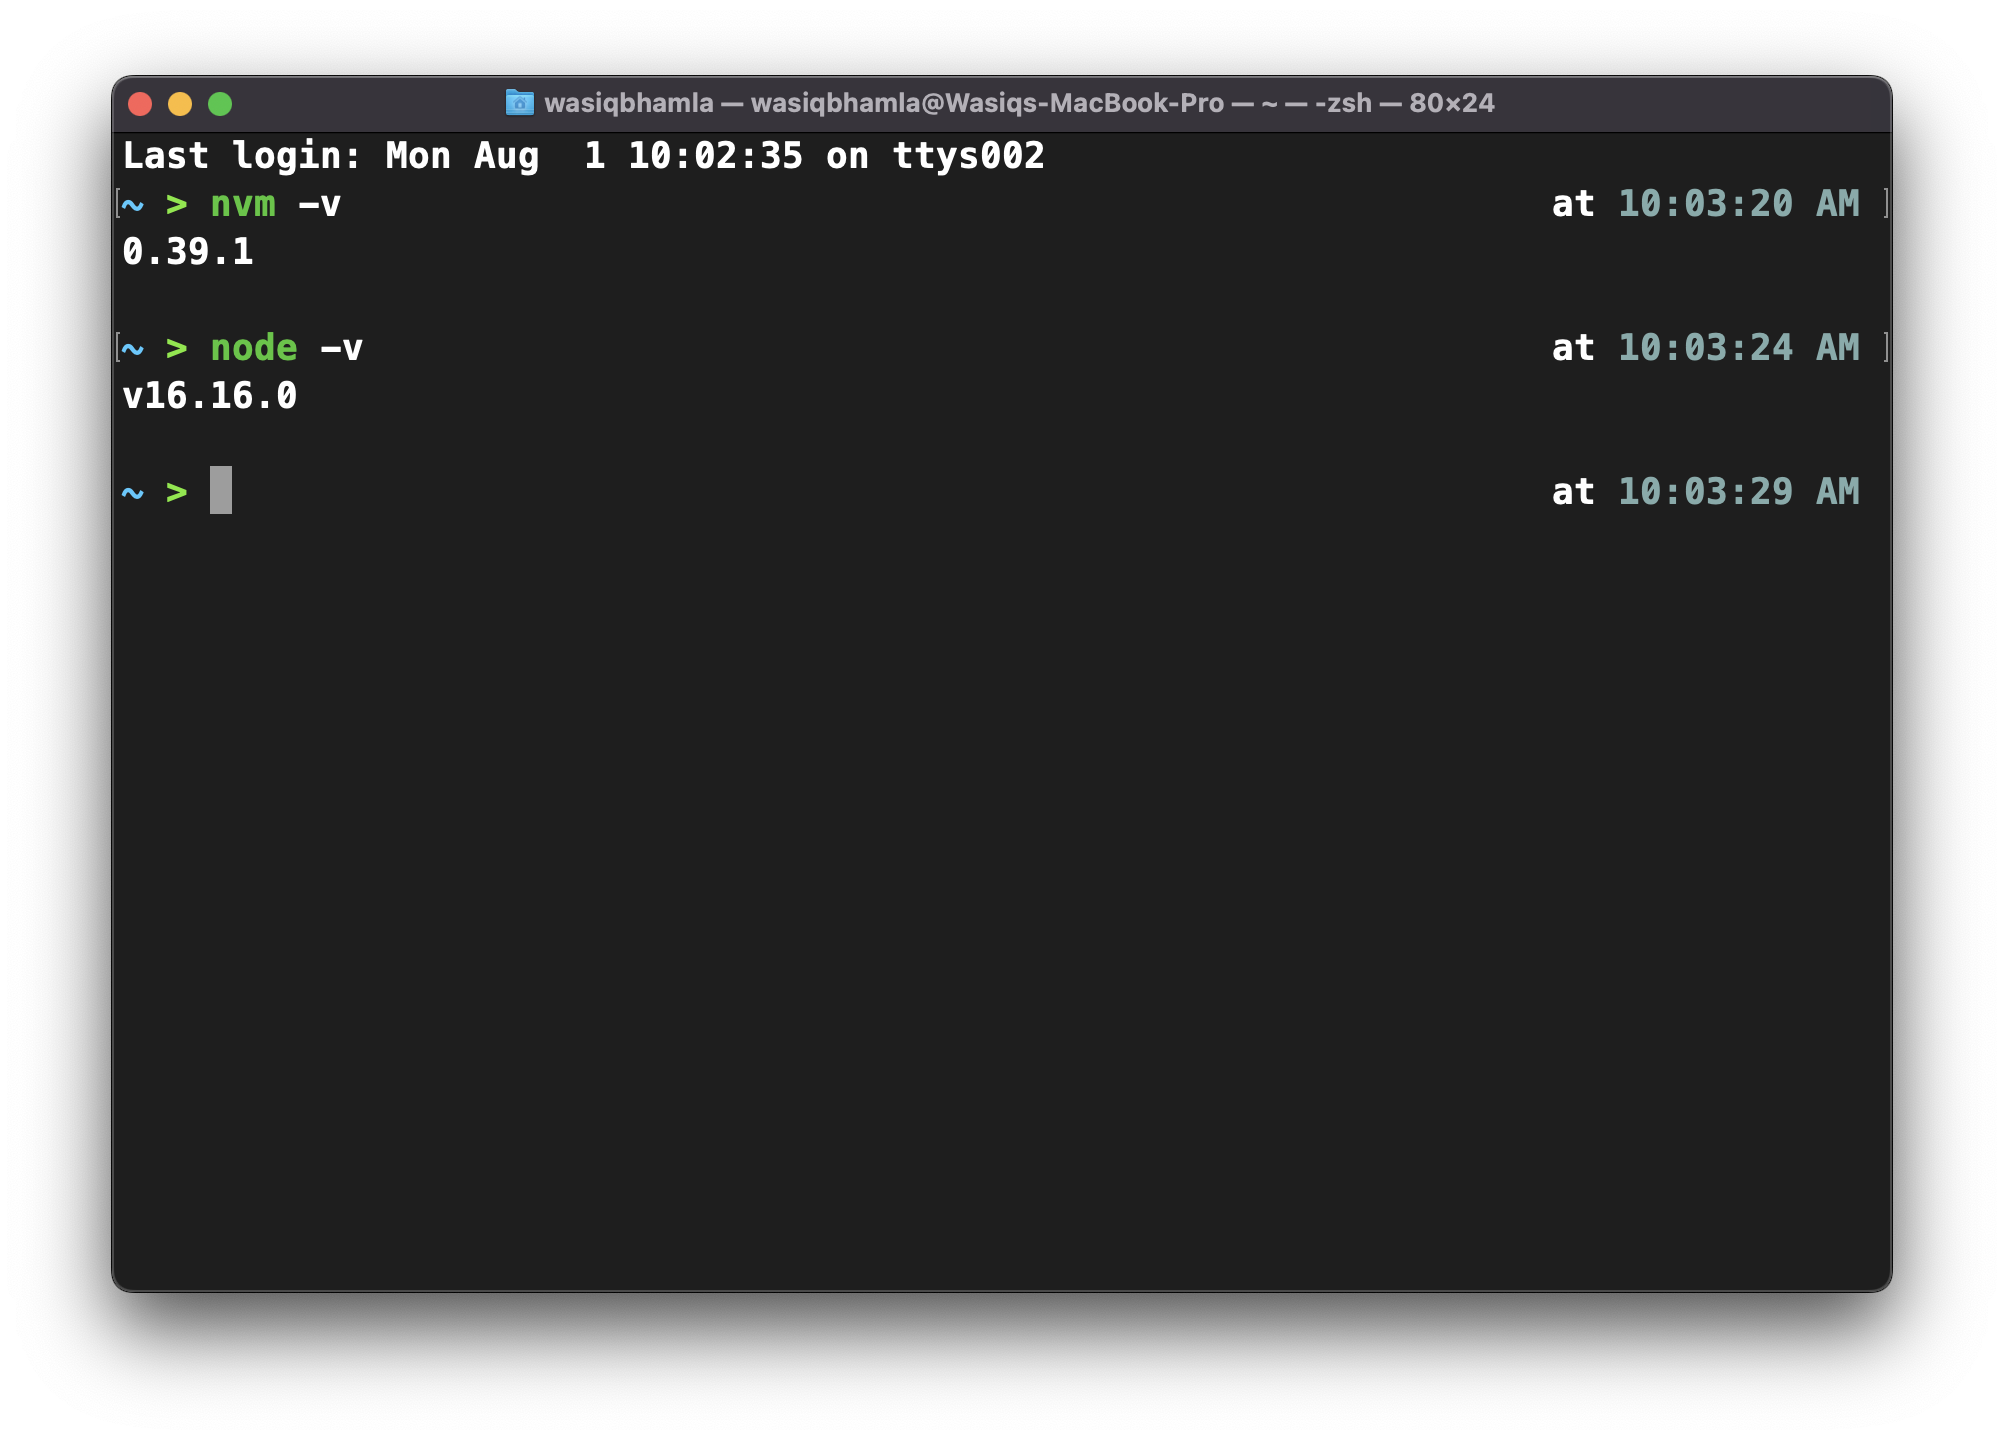
- Open Command Prompt and run the command:
Build the documentation project
To build the documentation project, navigate to the root folder of the project and run the following command:
> pnpm build:site
This will install all dependencies and build the documentation site.
Run the project
From the root repository directory, run the following command:
> pnpm start:site
This will start the documentation site on localhost:3000 and will constantly watch on any changes you do in the project.
Upgrade outdated dependencies
Dependency upgrade will only be done by boyka-core team members.
From the root repository directory, run the following command:
> pnpm up -i -r --latest
This will prompt to select the version to which we need to upgrade any particular dependency.