📩 Commit steps
We are using Conventional Commits to ensure that our code commits follow a consistent commit message format. To make sure that we are following the rules, we normally commit our changes with VSCode using the following steps:
1️⃣ Setup Auto GPG commit signing
We have branch protection setup in our project which requires that all commits should be GPG signed. So if you are not having your GPG keys, you can follow below steps to setup GPG for signing your commits.
1️⃣ Install GPG command line
Install the latest GPG command line from their site.
On Mac, you can also install GPG using Homebrew by executing brew install gnupg.
2️⃣ Generate GPG keys
To generate a new GPG keys, run the following command:
> gpg --full-generate-key
Enter the prompts properly and set a good passphrase.
3️⃣ Fetch the GPG key
Once the key is created, you need to get the GPG key ID, run the command:
> gpg --list-secret-keys --keyid-format=long
You will see the output similar to the following:
/Users/username/.gnupg/pubring.kbx
-------------------------------------
sec   rsa4096/AB510283YYYYYYYY 2018-07-03 [SC]
      AAAAAAAAAA2010DD804CBB15AB510283YYYYYYYY
uid                 [ unknown] Your Name (Your role) <your.email@gmail.com>
ssb   rsa4096/AAAAA90AB0B84BE 2018-07-03 [E]
The key you need is marked with Y 8 chars in the lines highlighted above.
4️⃣ Set GPG key in GitHub
Execute the following command to get the GPG public key:
> gpg --armor --export <your-8-digit-gpg-id>
Copy the output from the above command,
- Open your GitHub GPG settings page
- Click on
New GPG Keybutton - Add any suitable
Title - Paste your GPG public key copied from above in
Keytextarea - Click on
Add GPG keybutton
5️⃣ Setup Git to Auto sign commits
Setup your Git configuration on your machine to tell it to automatically sign your commits by using the following commands:
> git config --global gpg.program gpg
> git config --global user.signingkey <your-8-digit-gpg-id>
> git config --global commit.gpgsign true
2️⃣ Add Conventional Commits extension
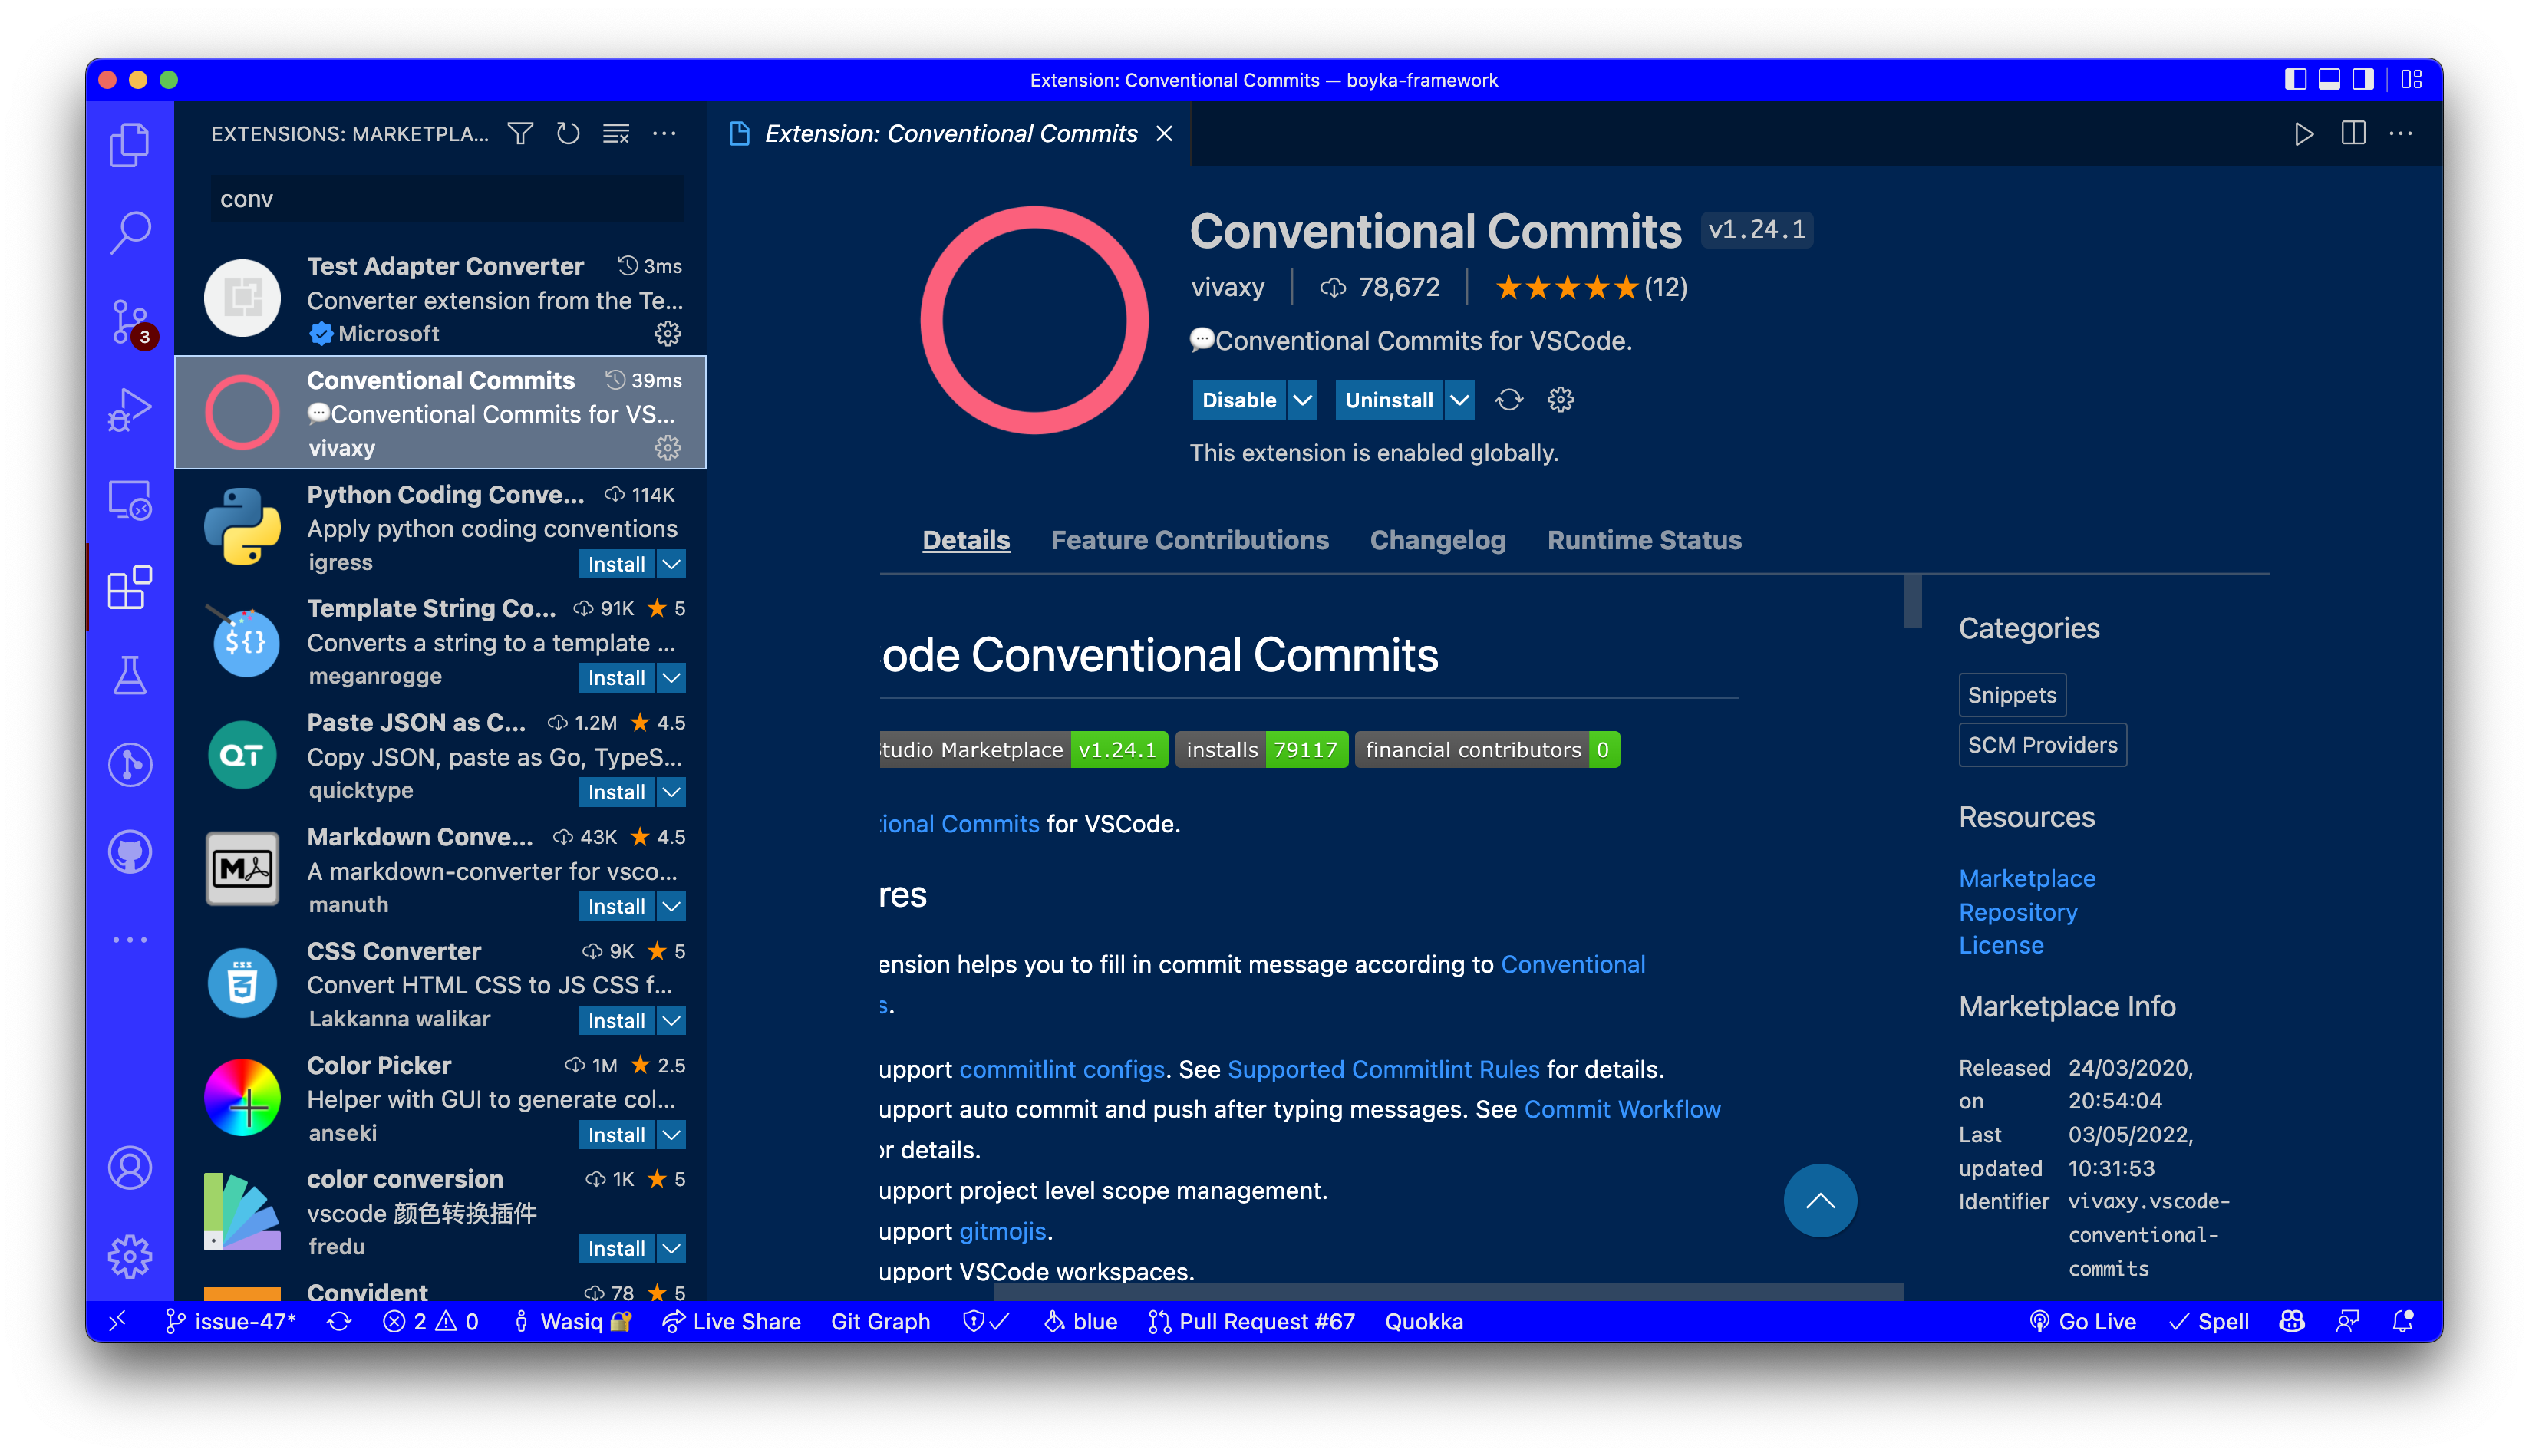
Search for Conventional Commits in the VSCode Marketplace and install it.
3️⃣ Disable auto commit
After installing the extension, you can disable the auto commit feature in the settings.
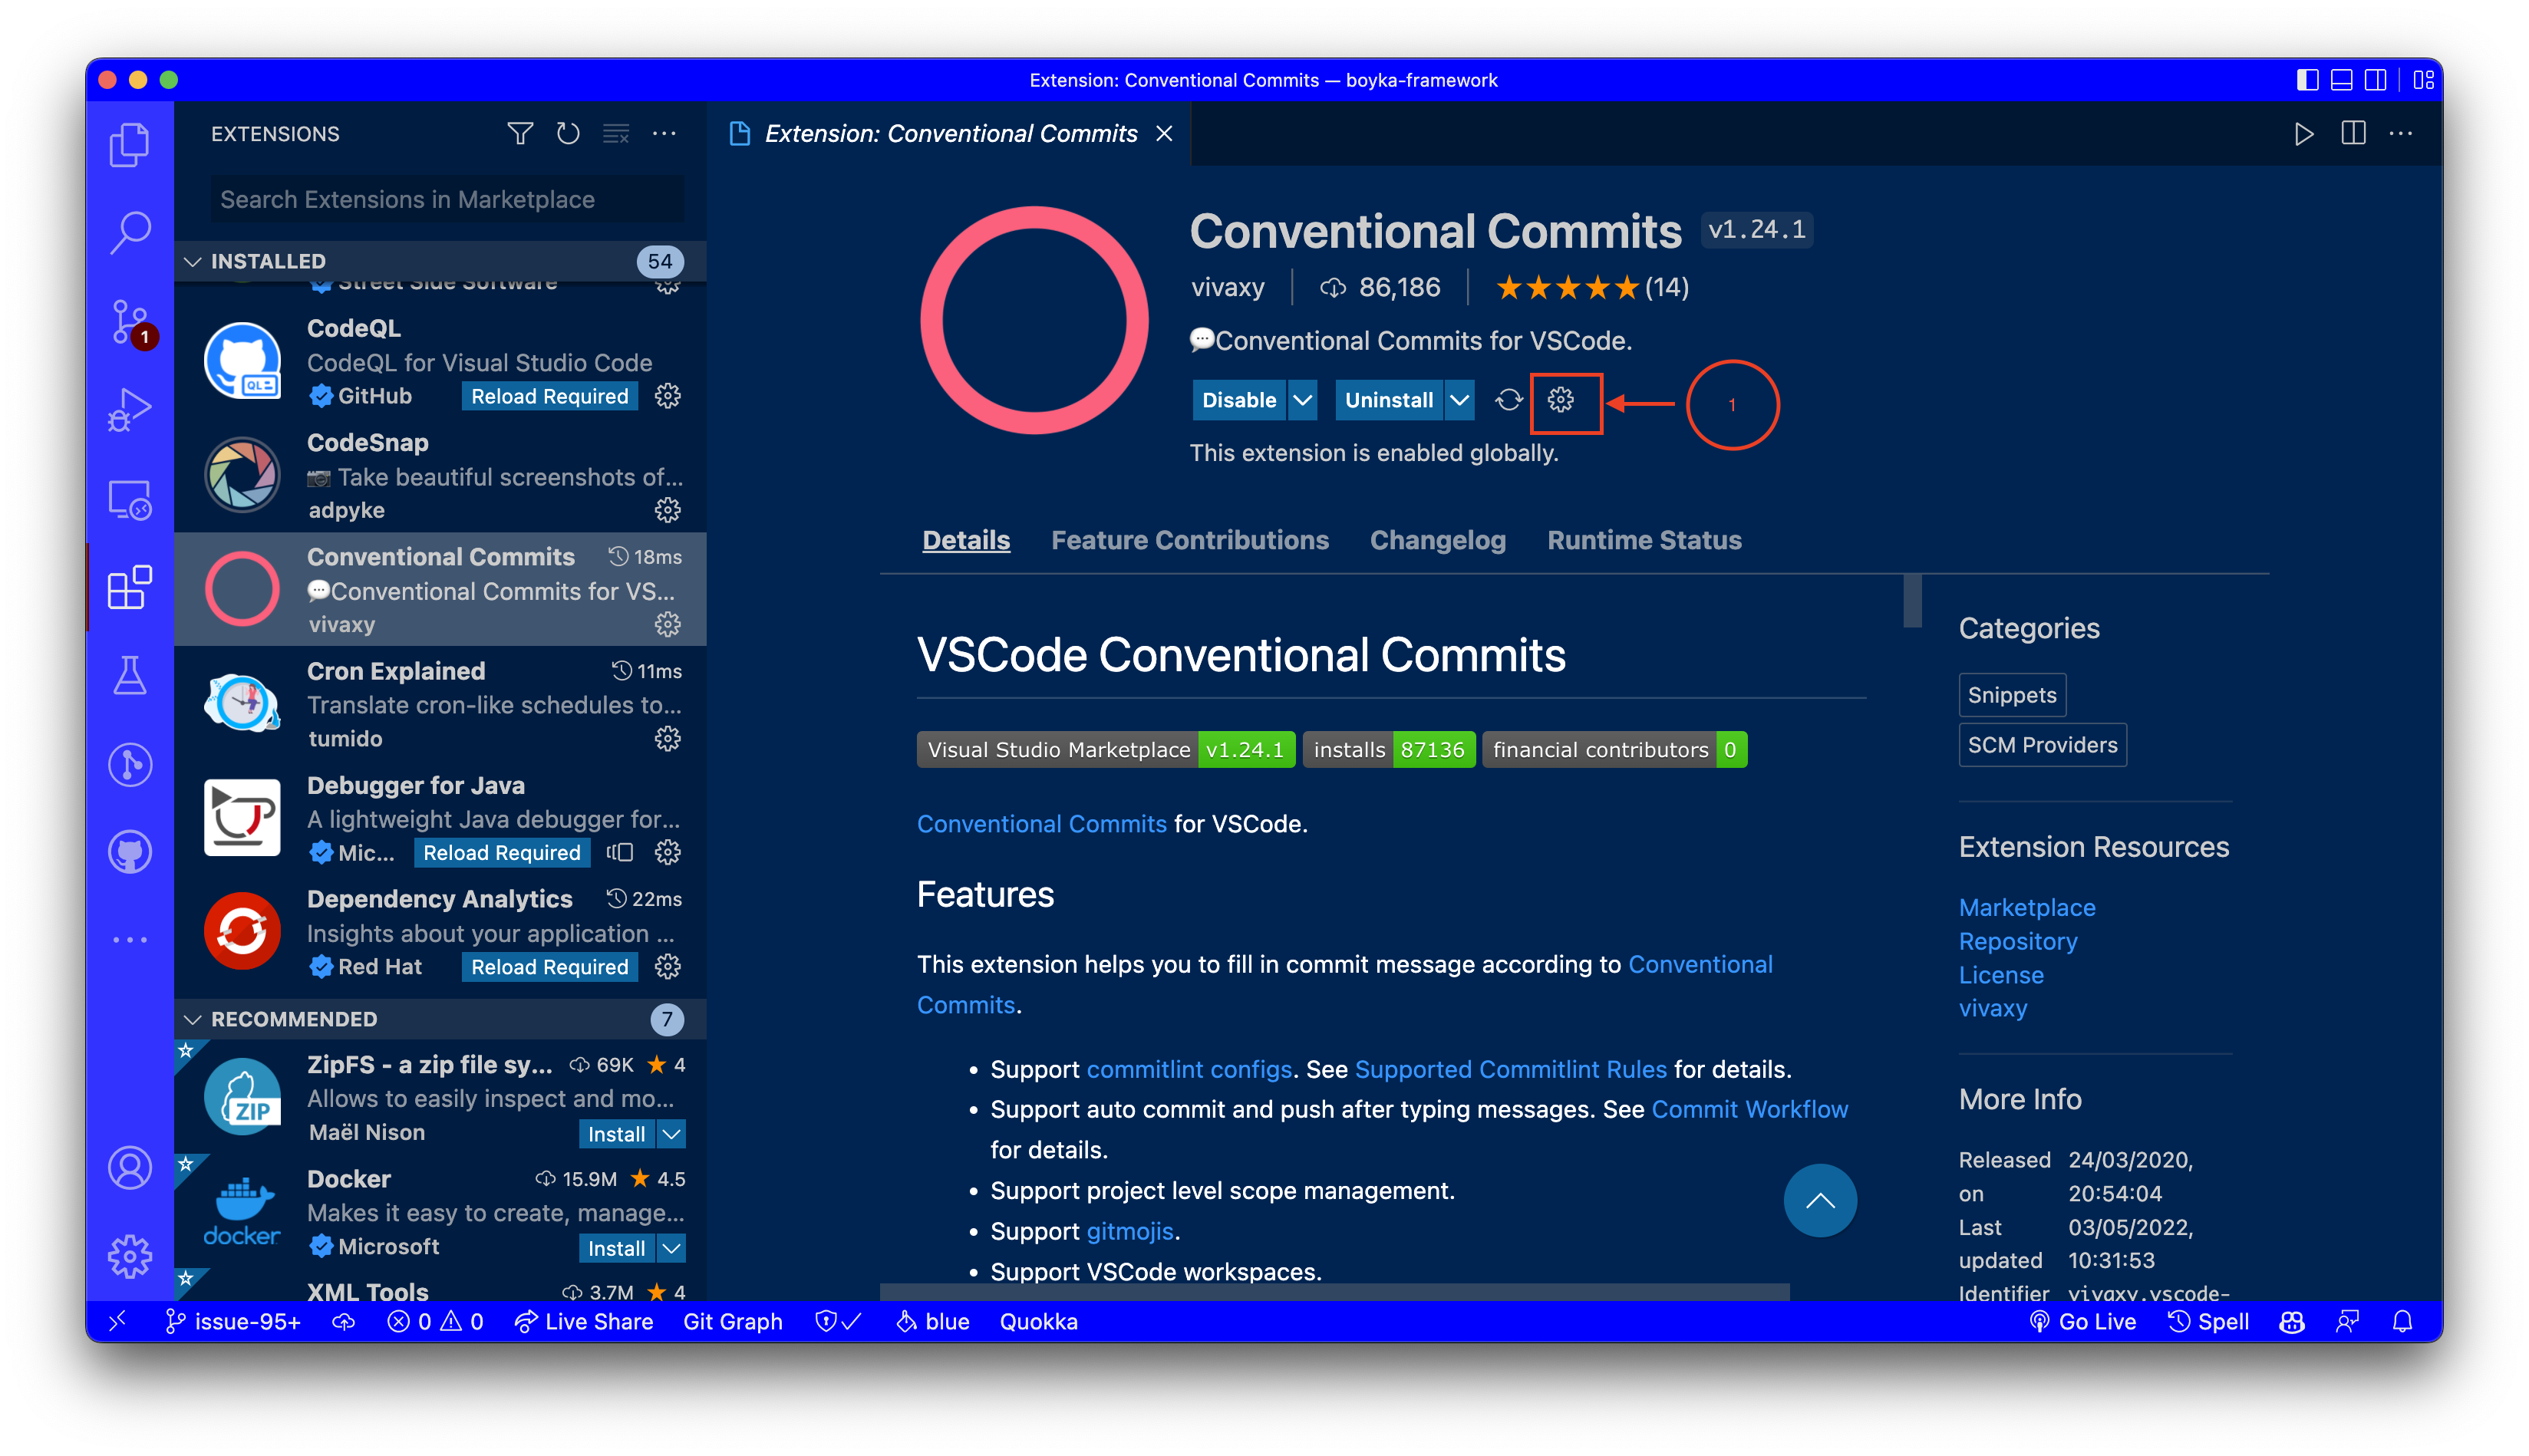
To access the settings, click on the Settings icon as shown in the screenshot above.
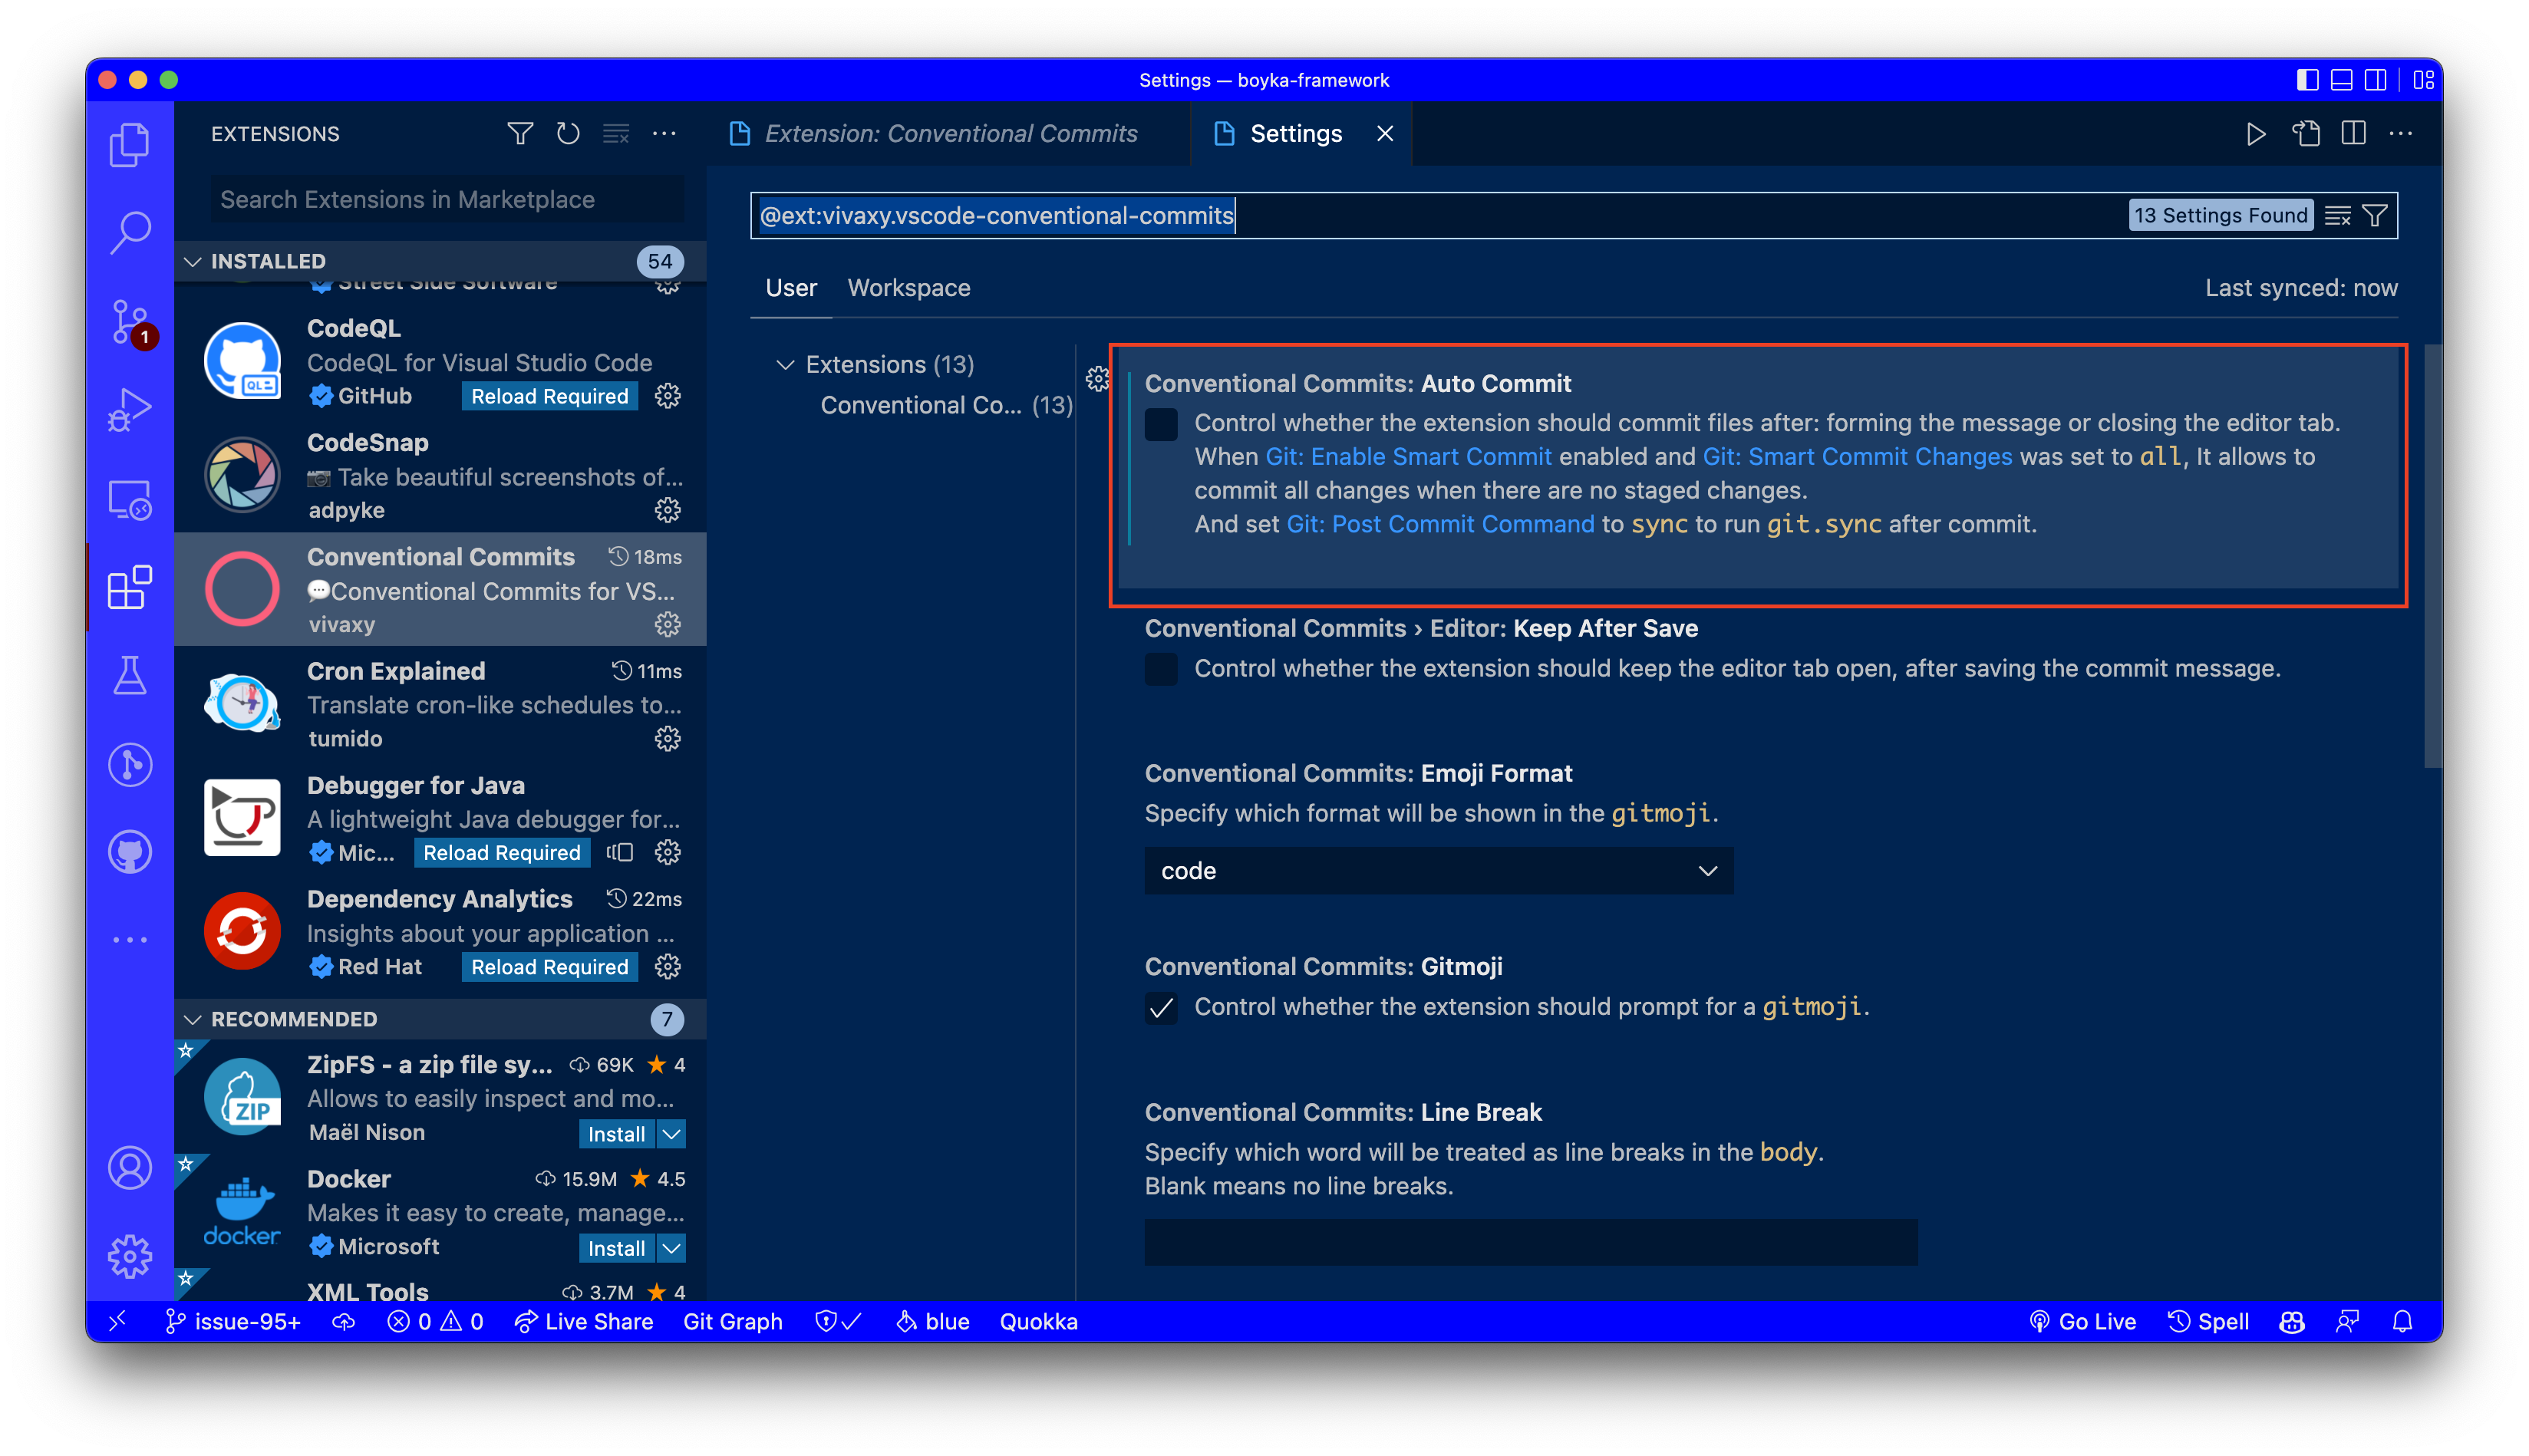
Once you click on the Settings icon, you will see a list of settings for the Conventional Commits extension. Here you can uncheck the Auto commit option.
4️⃣ Build commit message
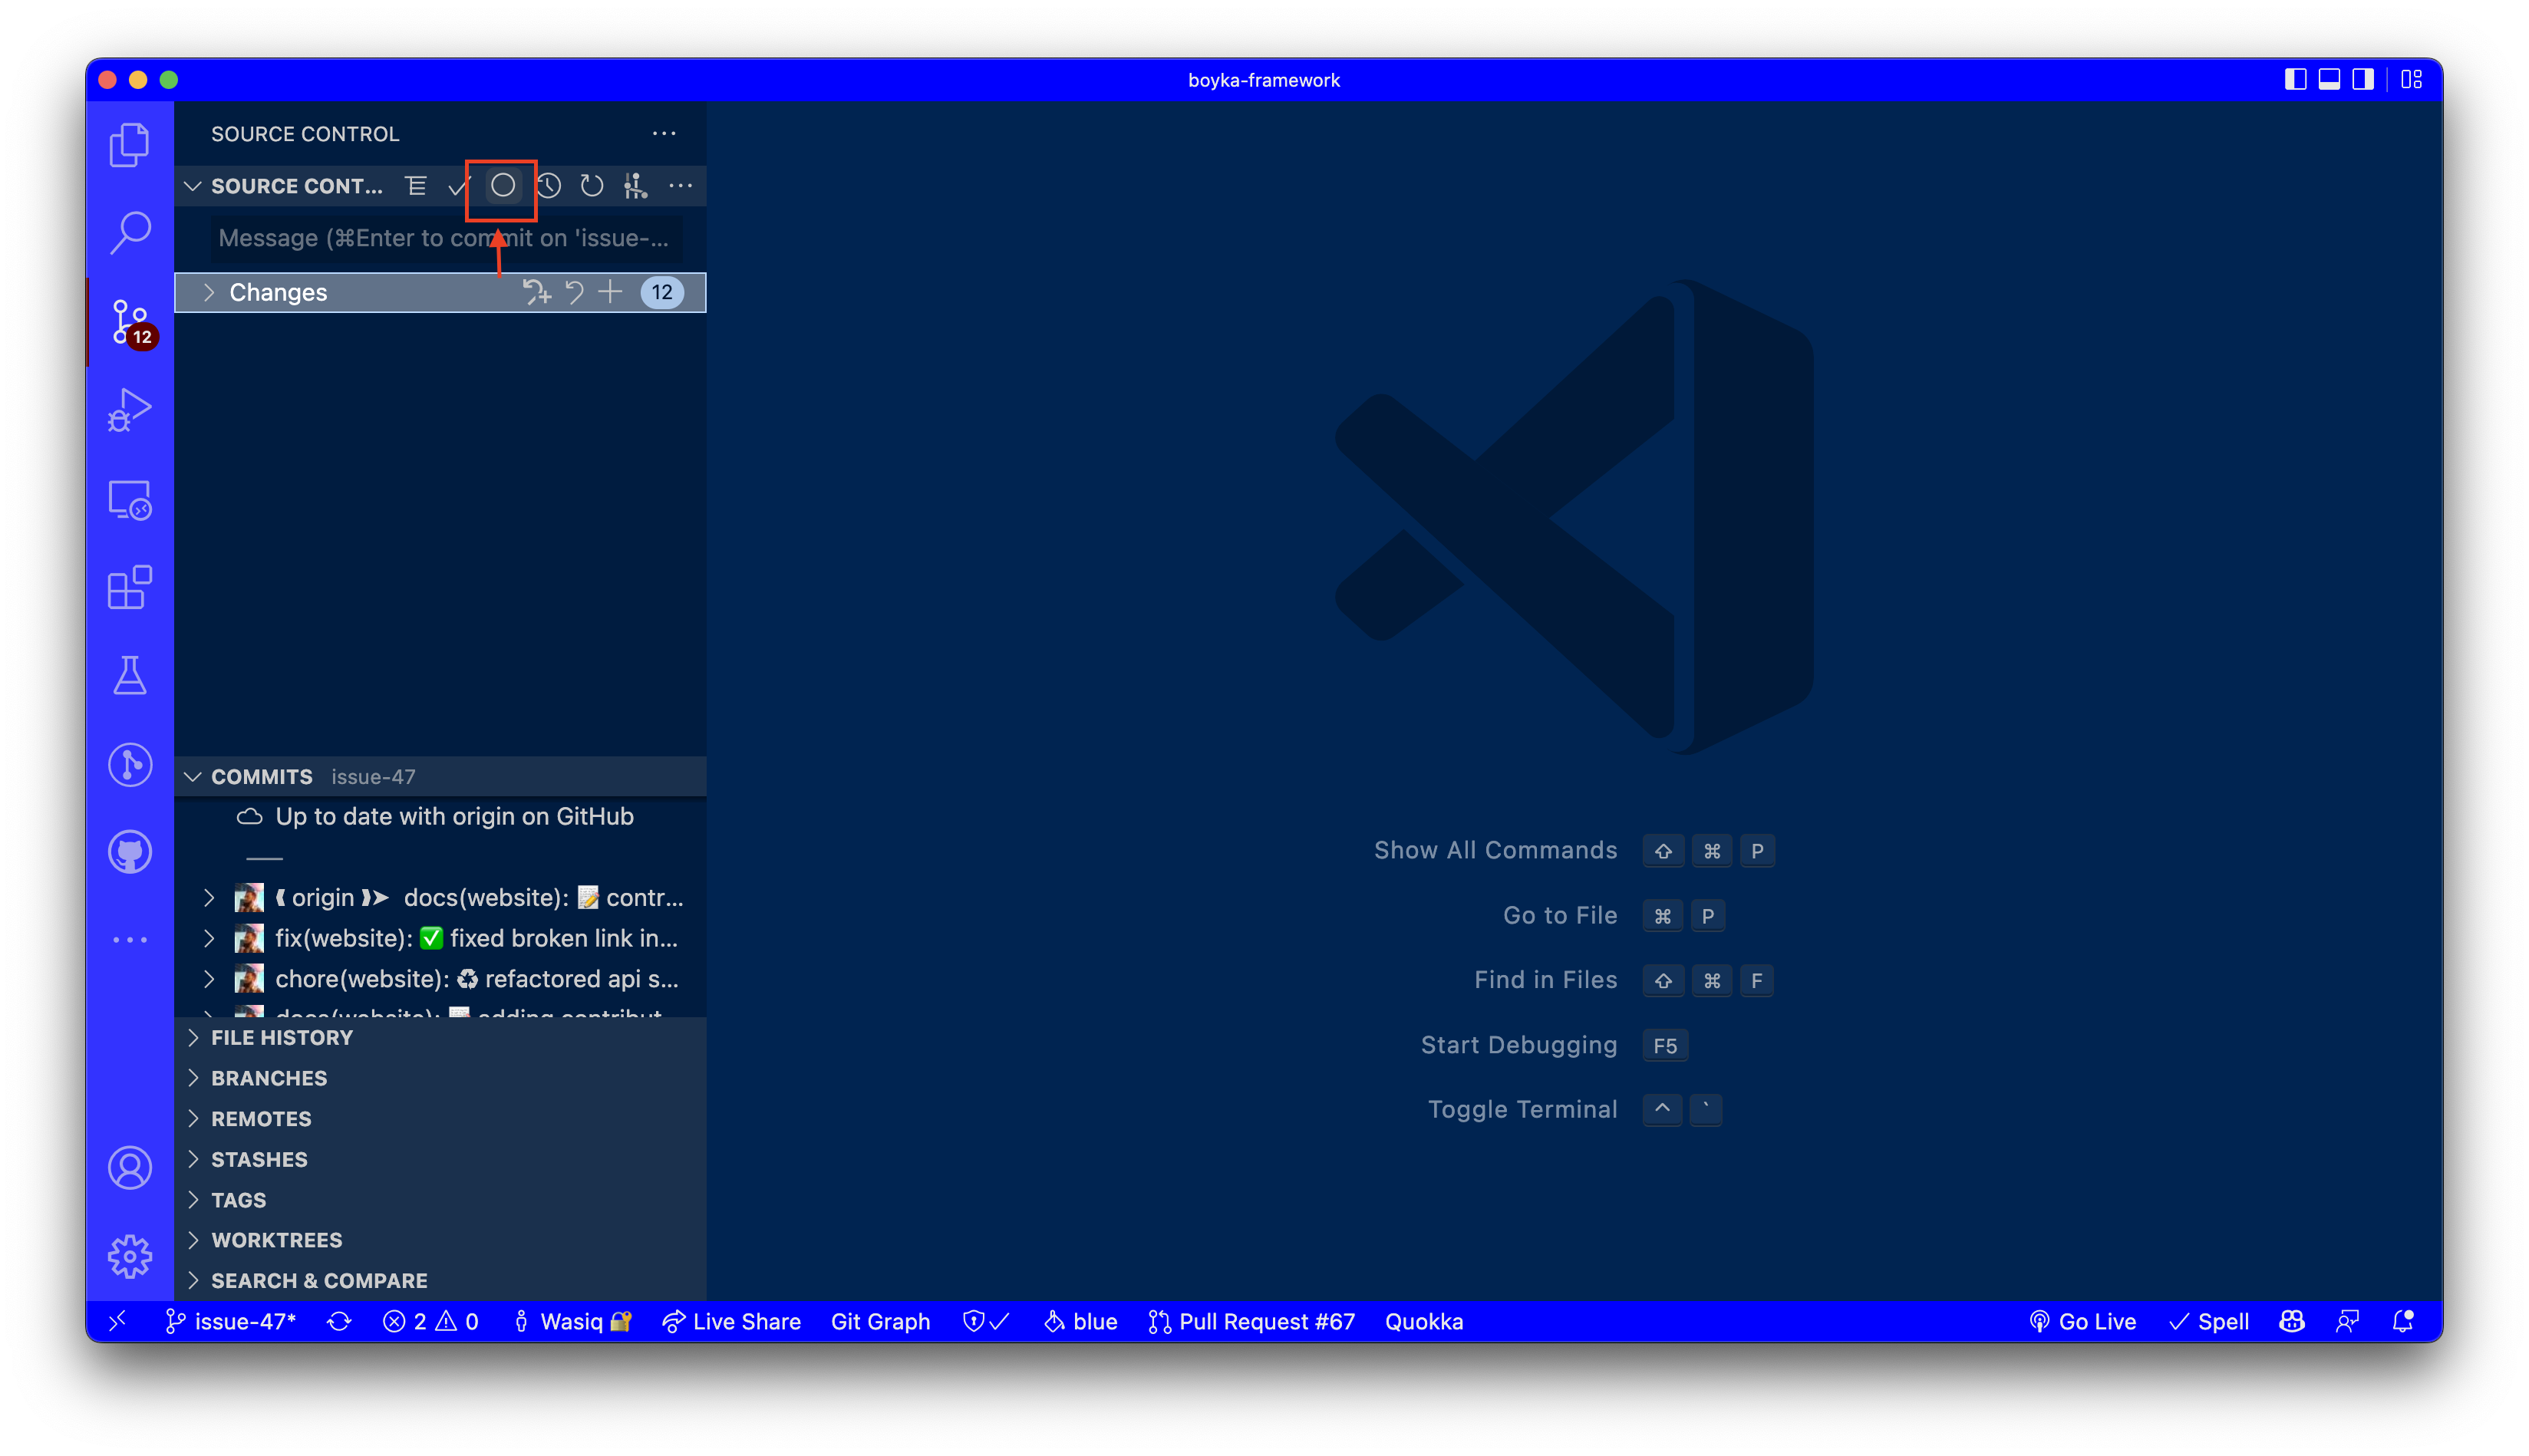
When you are ready to commit, press on Conventional commit icon in source control tab to open the commit prompt.
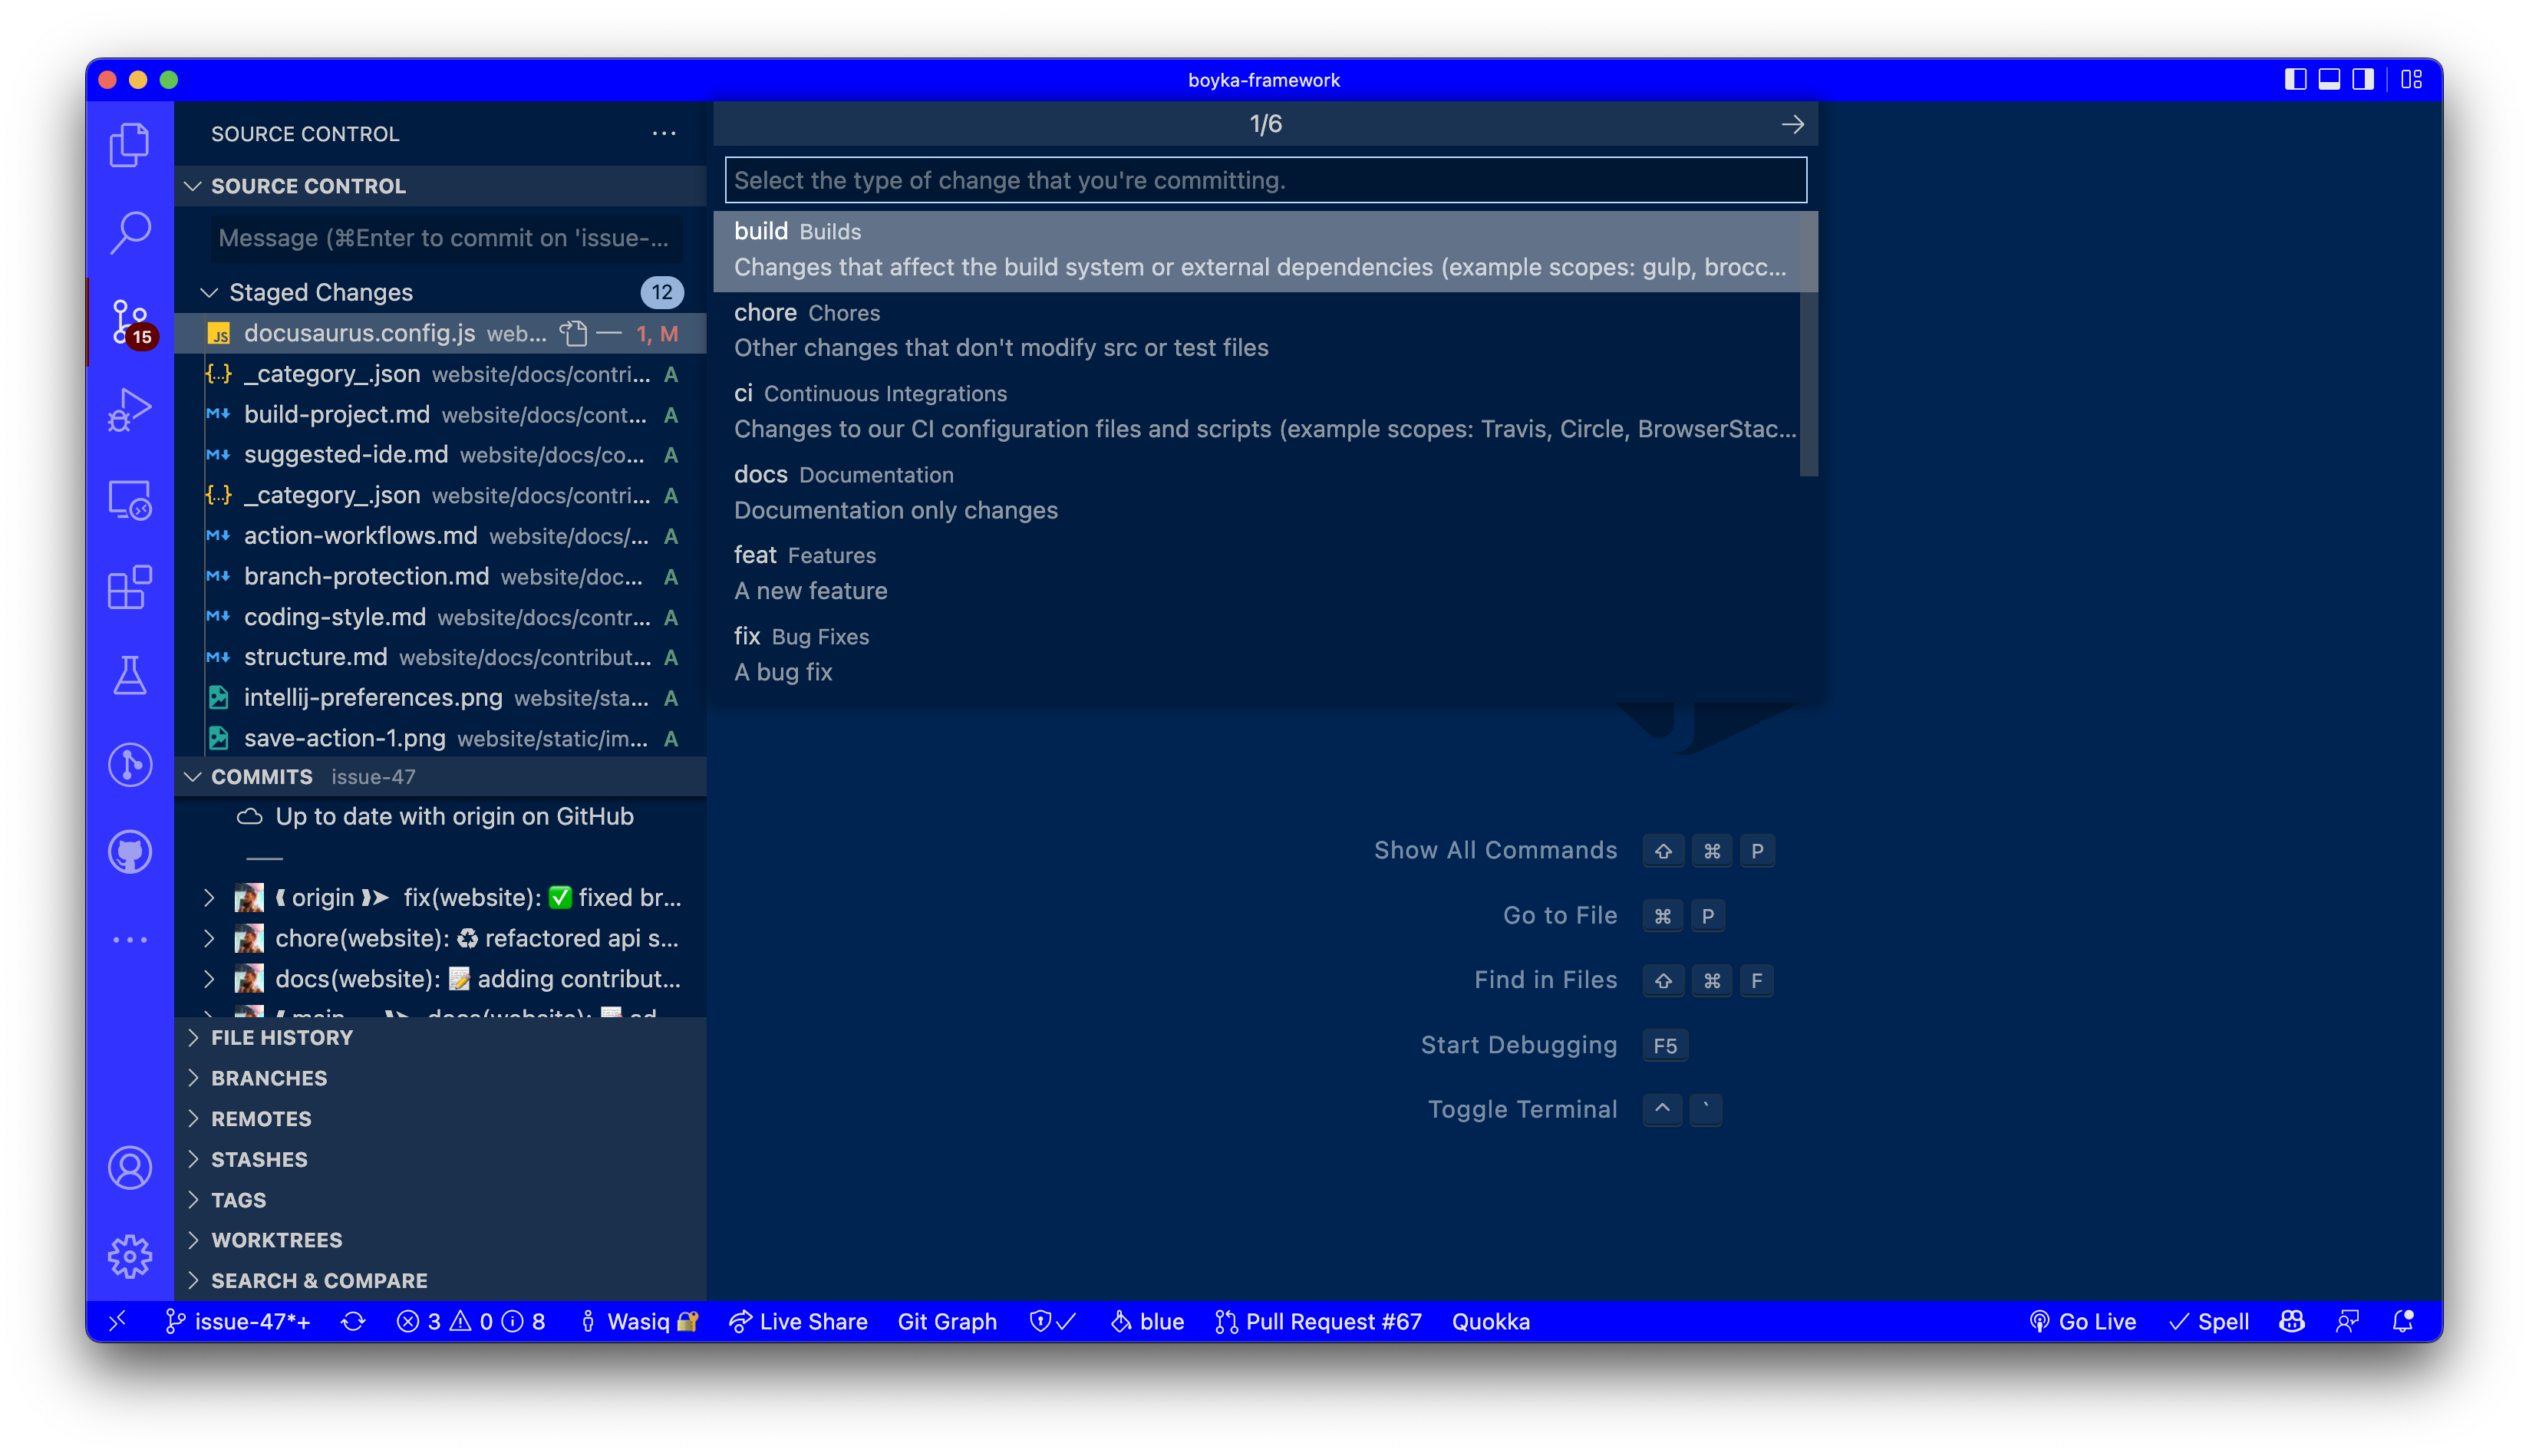
1️⃣ Add commit type
When you click on the Conventional Commit button, you will see a list of available commit types. Select the one that best describes your changes.
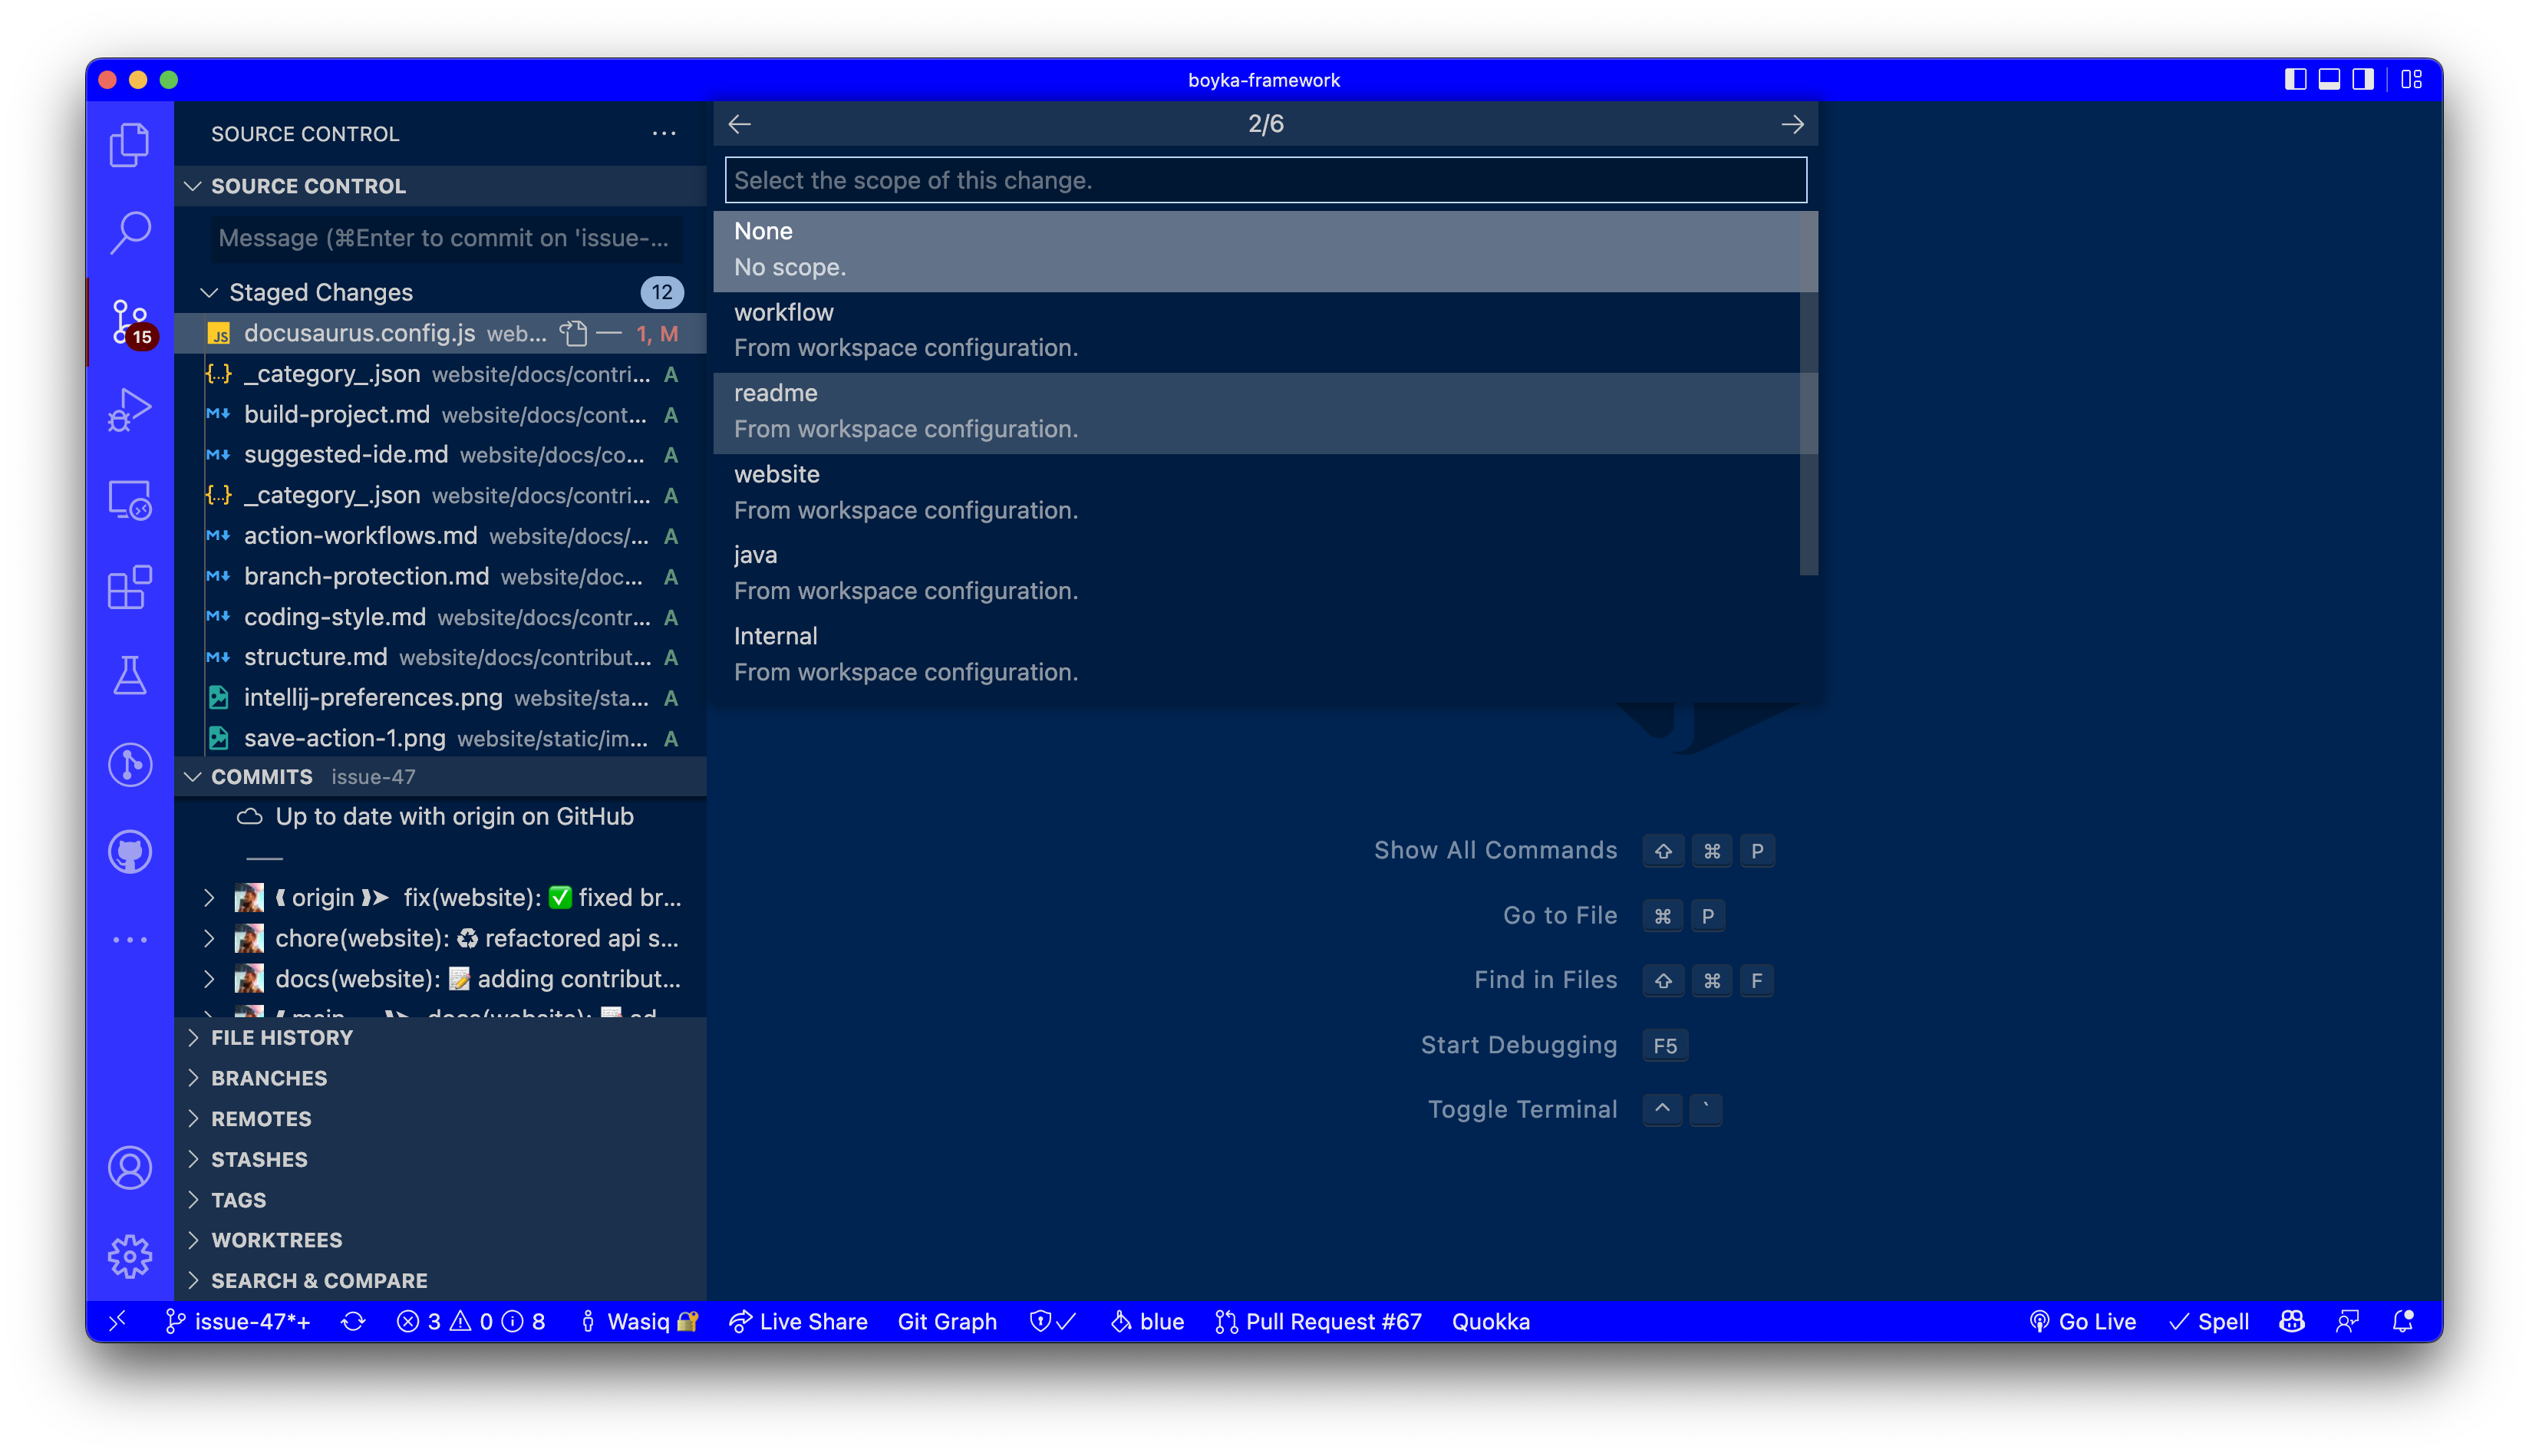
2️⃣ Add commit scope
After you select the commit type, you will see a list of available scopes. Select the one that best describes your changes. If you don't see any scope, you can let the boyka-core team know about it and we will add it for you.
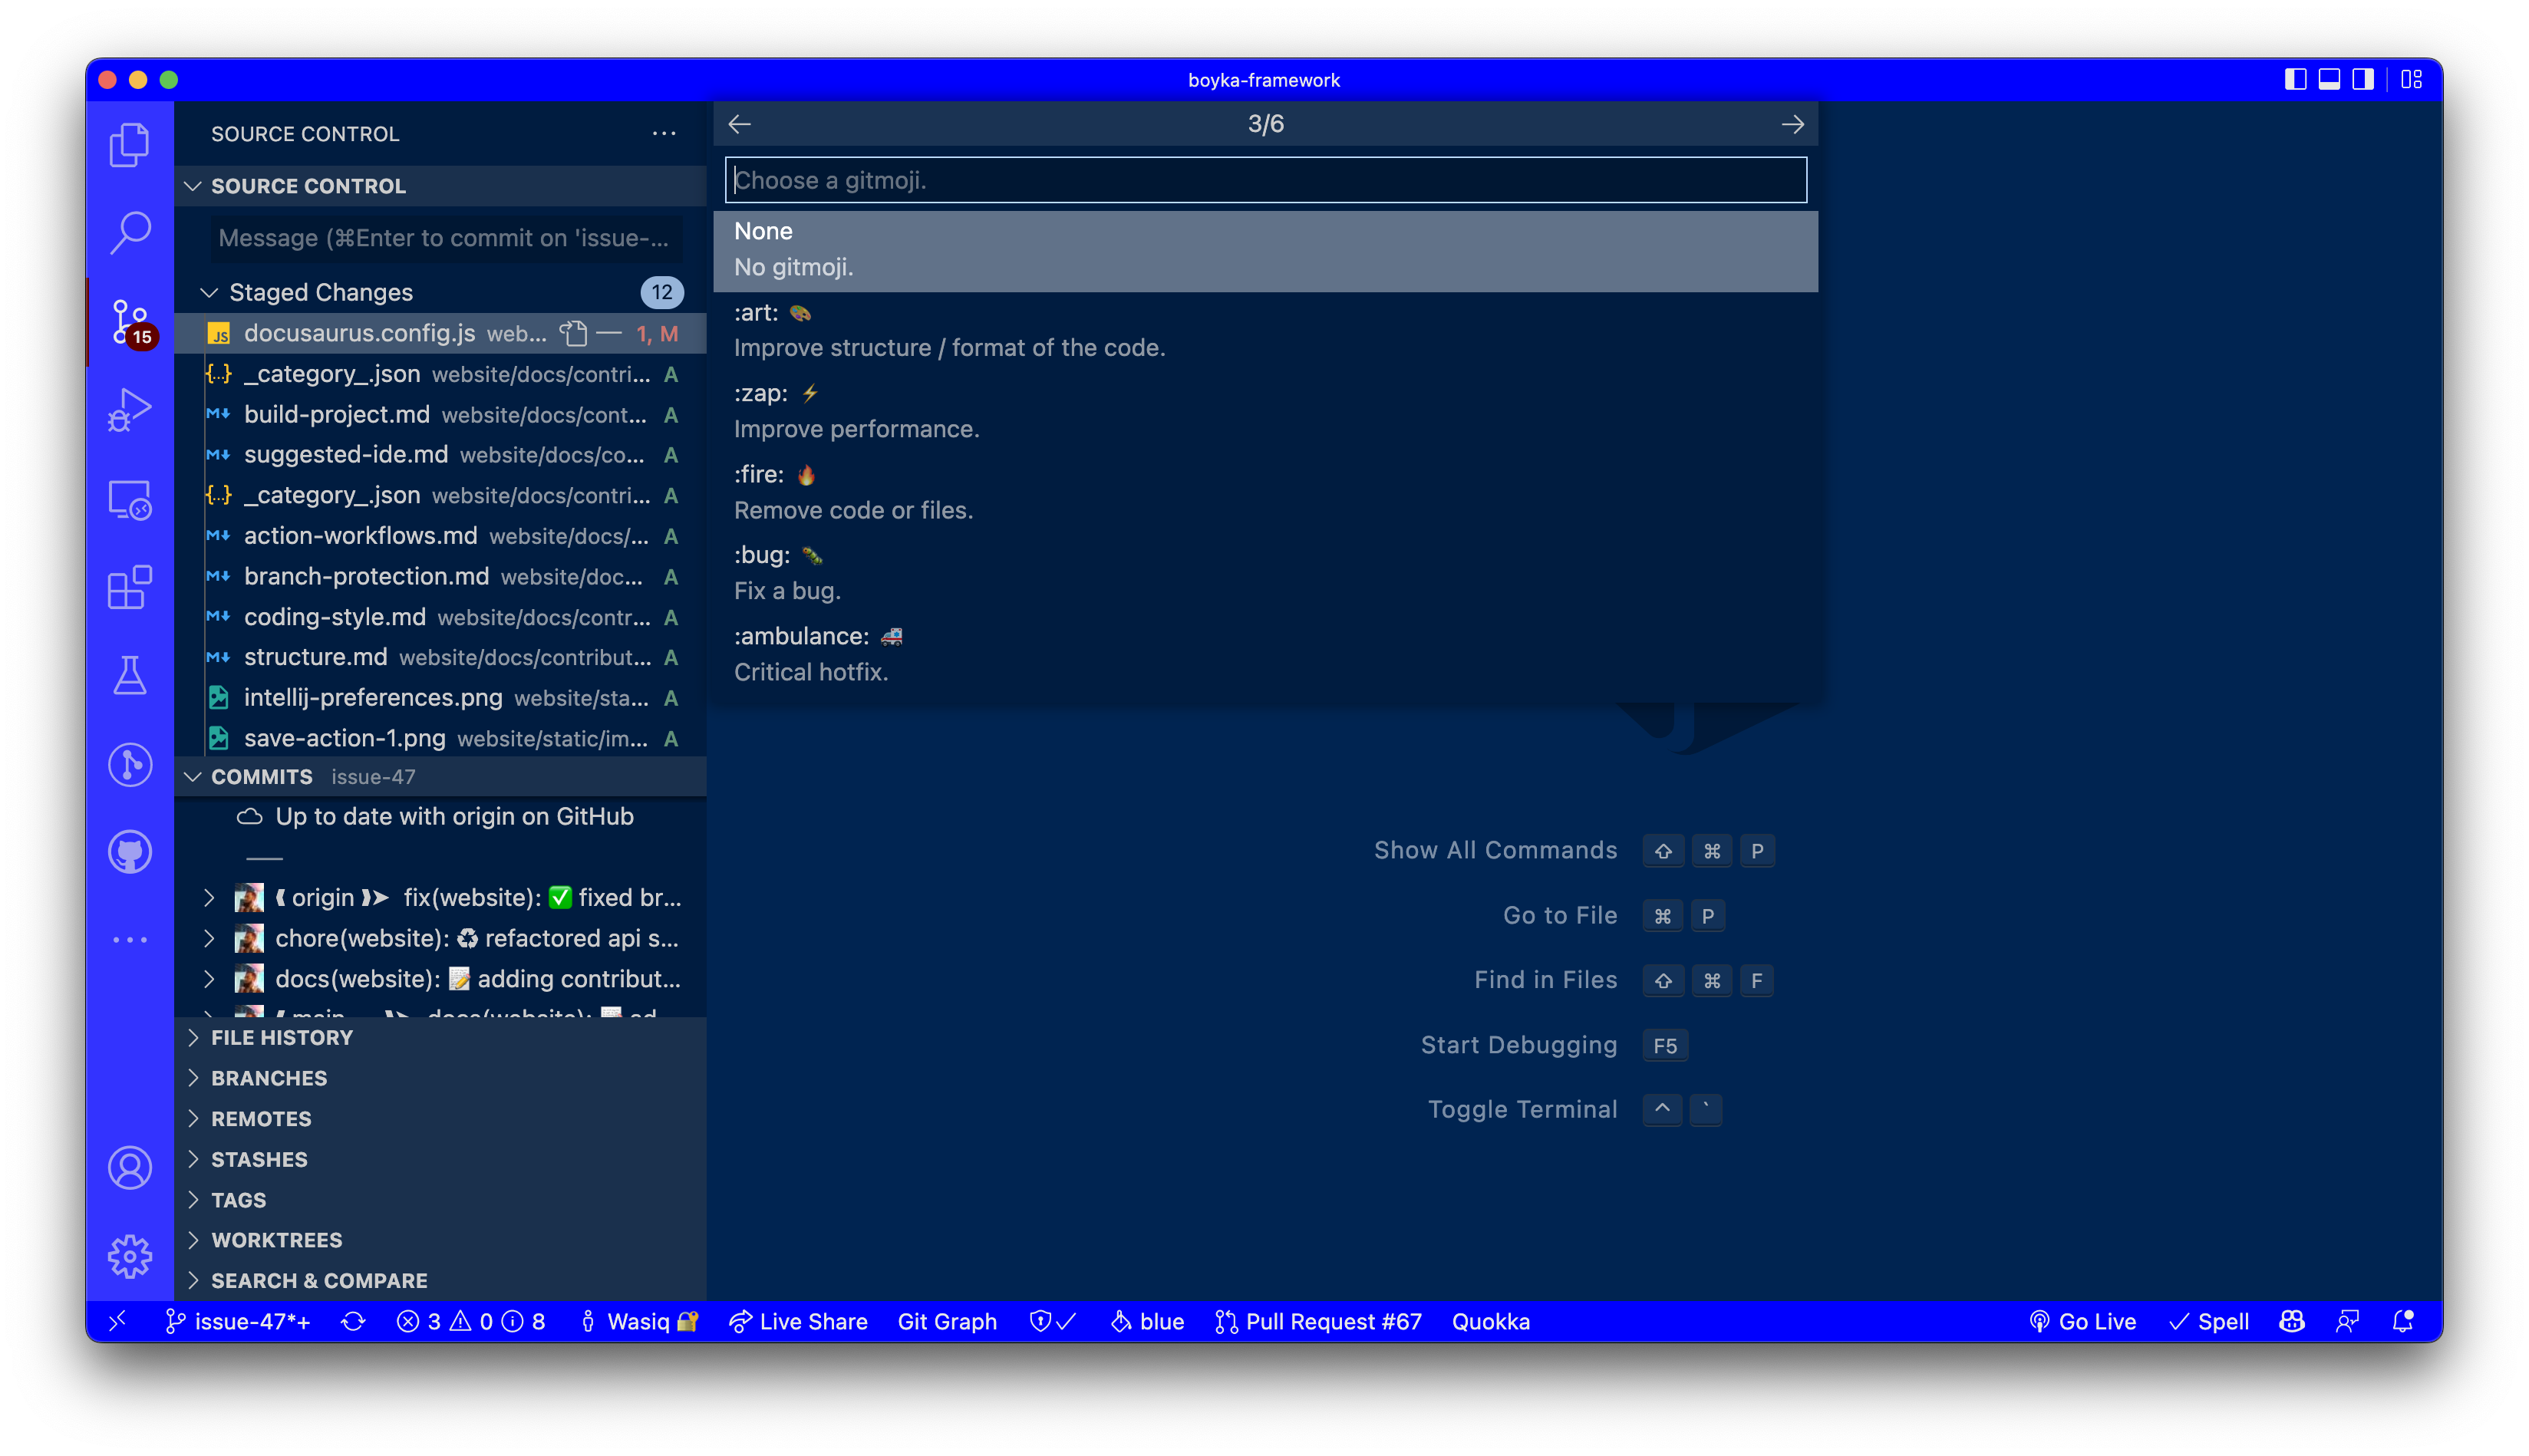
3️⃣ Add relatable Emoji
After you select the commit scope, you will see a list of available Emoji's. Select the one that best describes your changes.
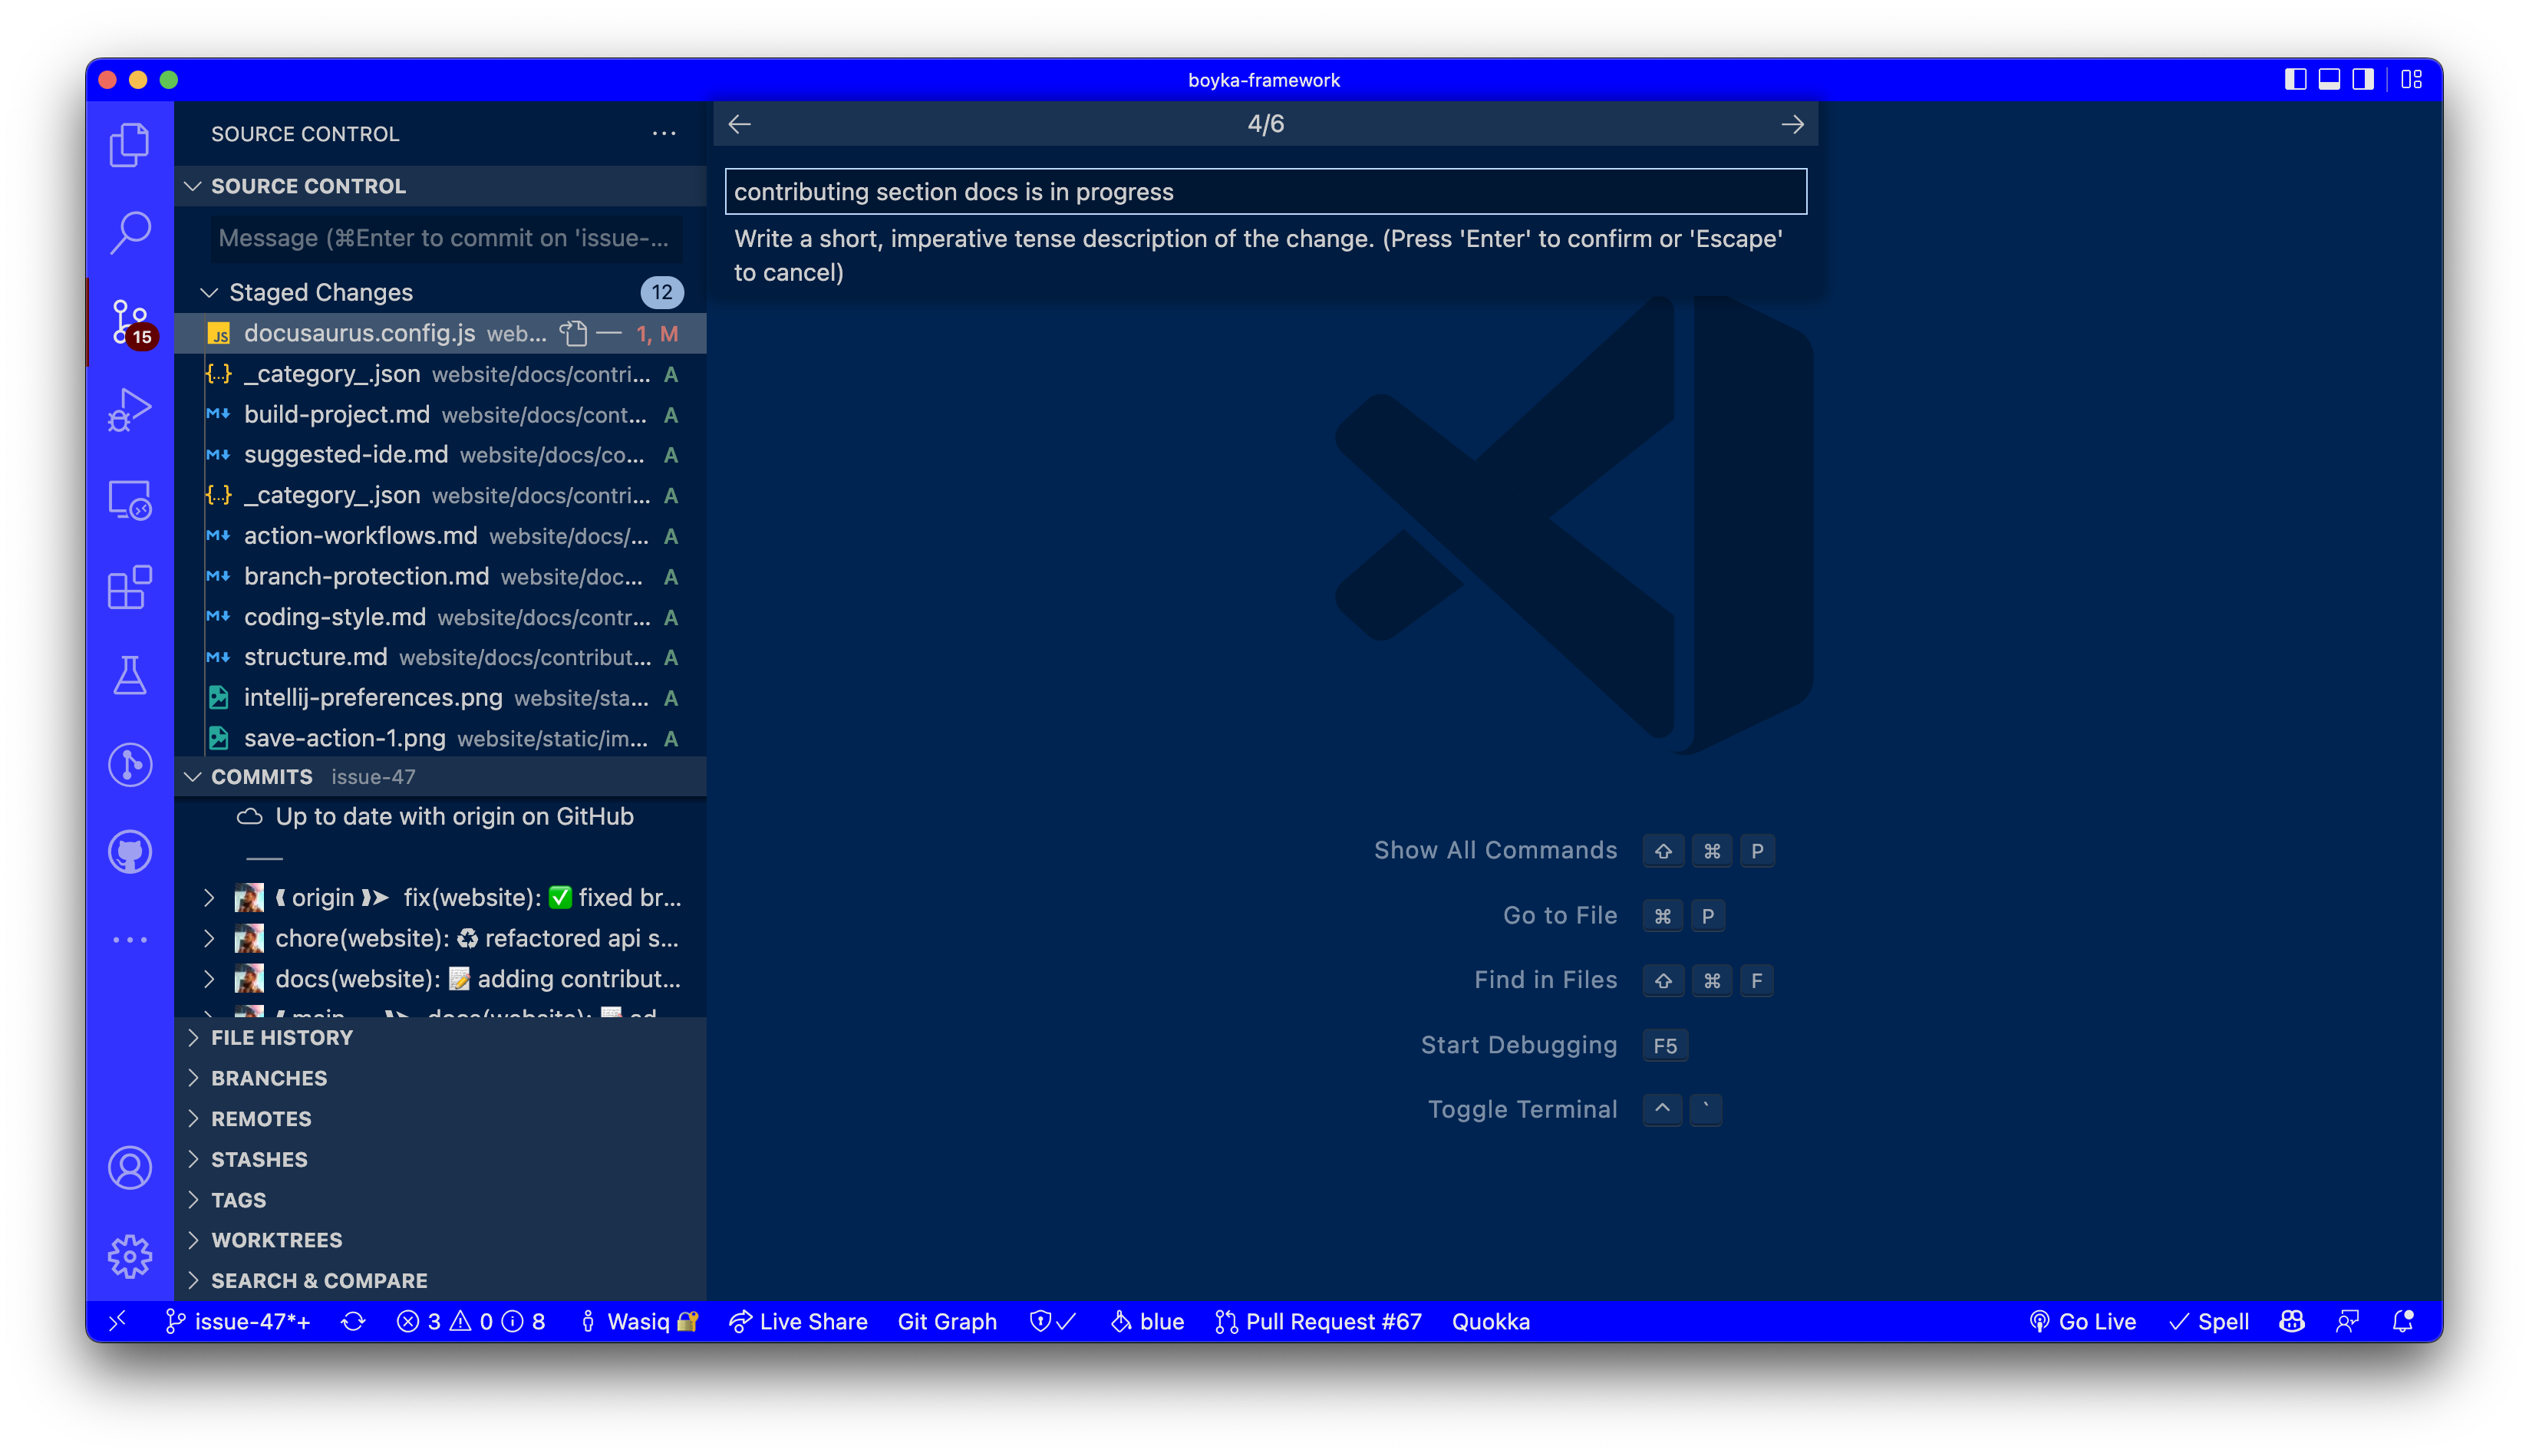
4️⃣ Add short description
After you select the commit emoji, you will see a text field where you can write a short description of your changes.
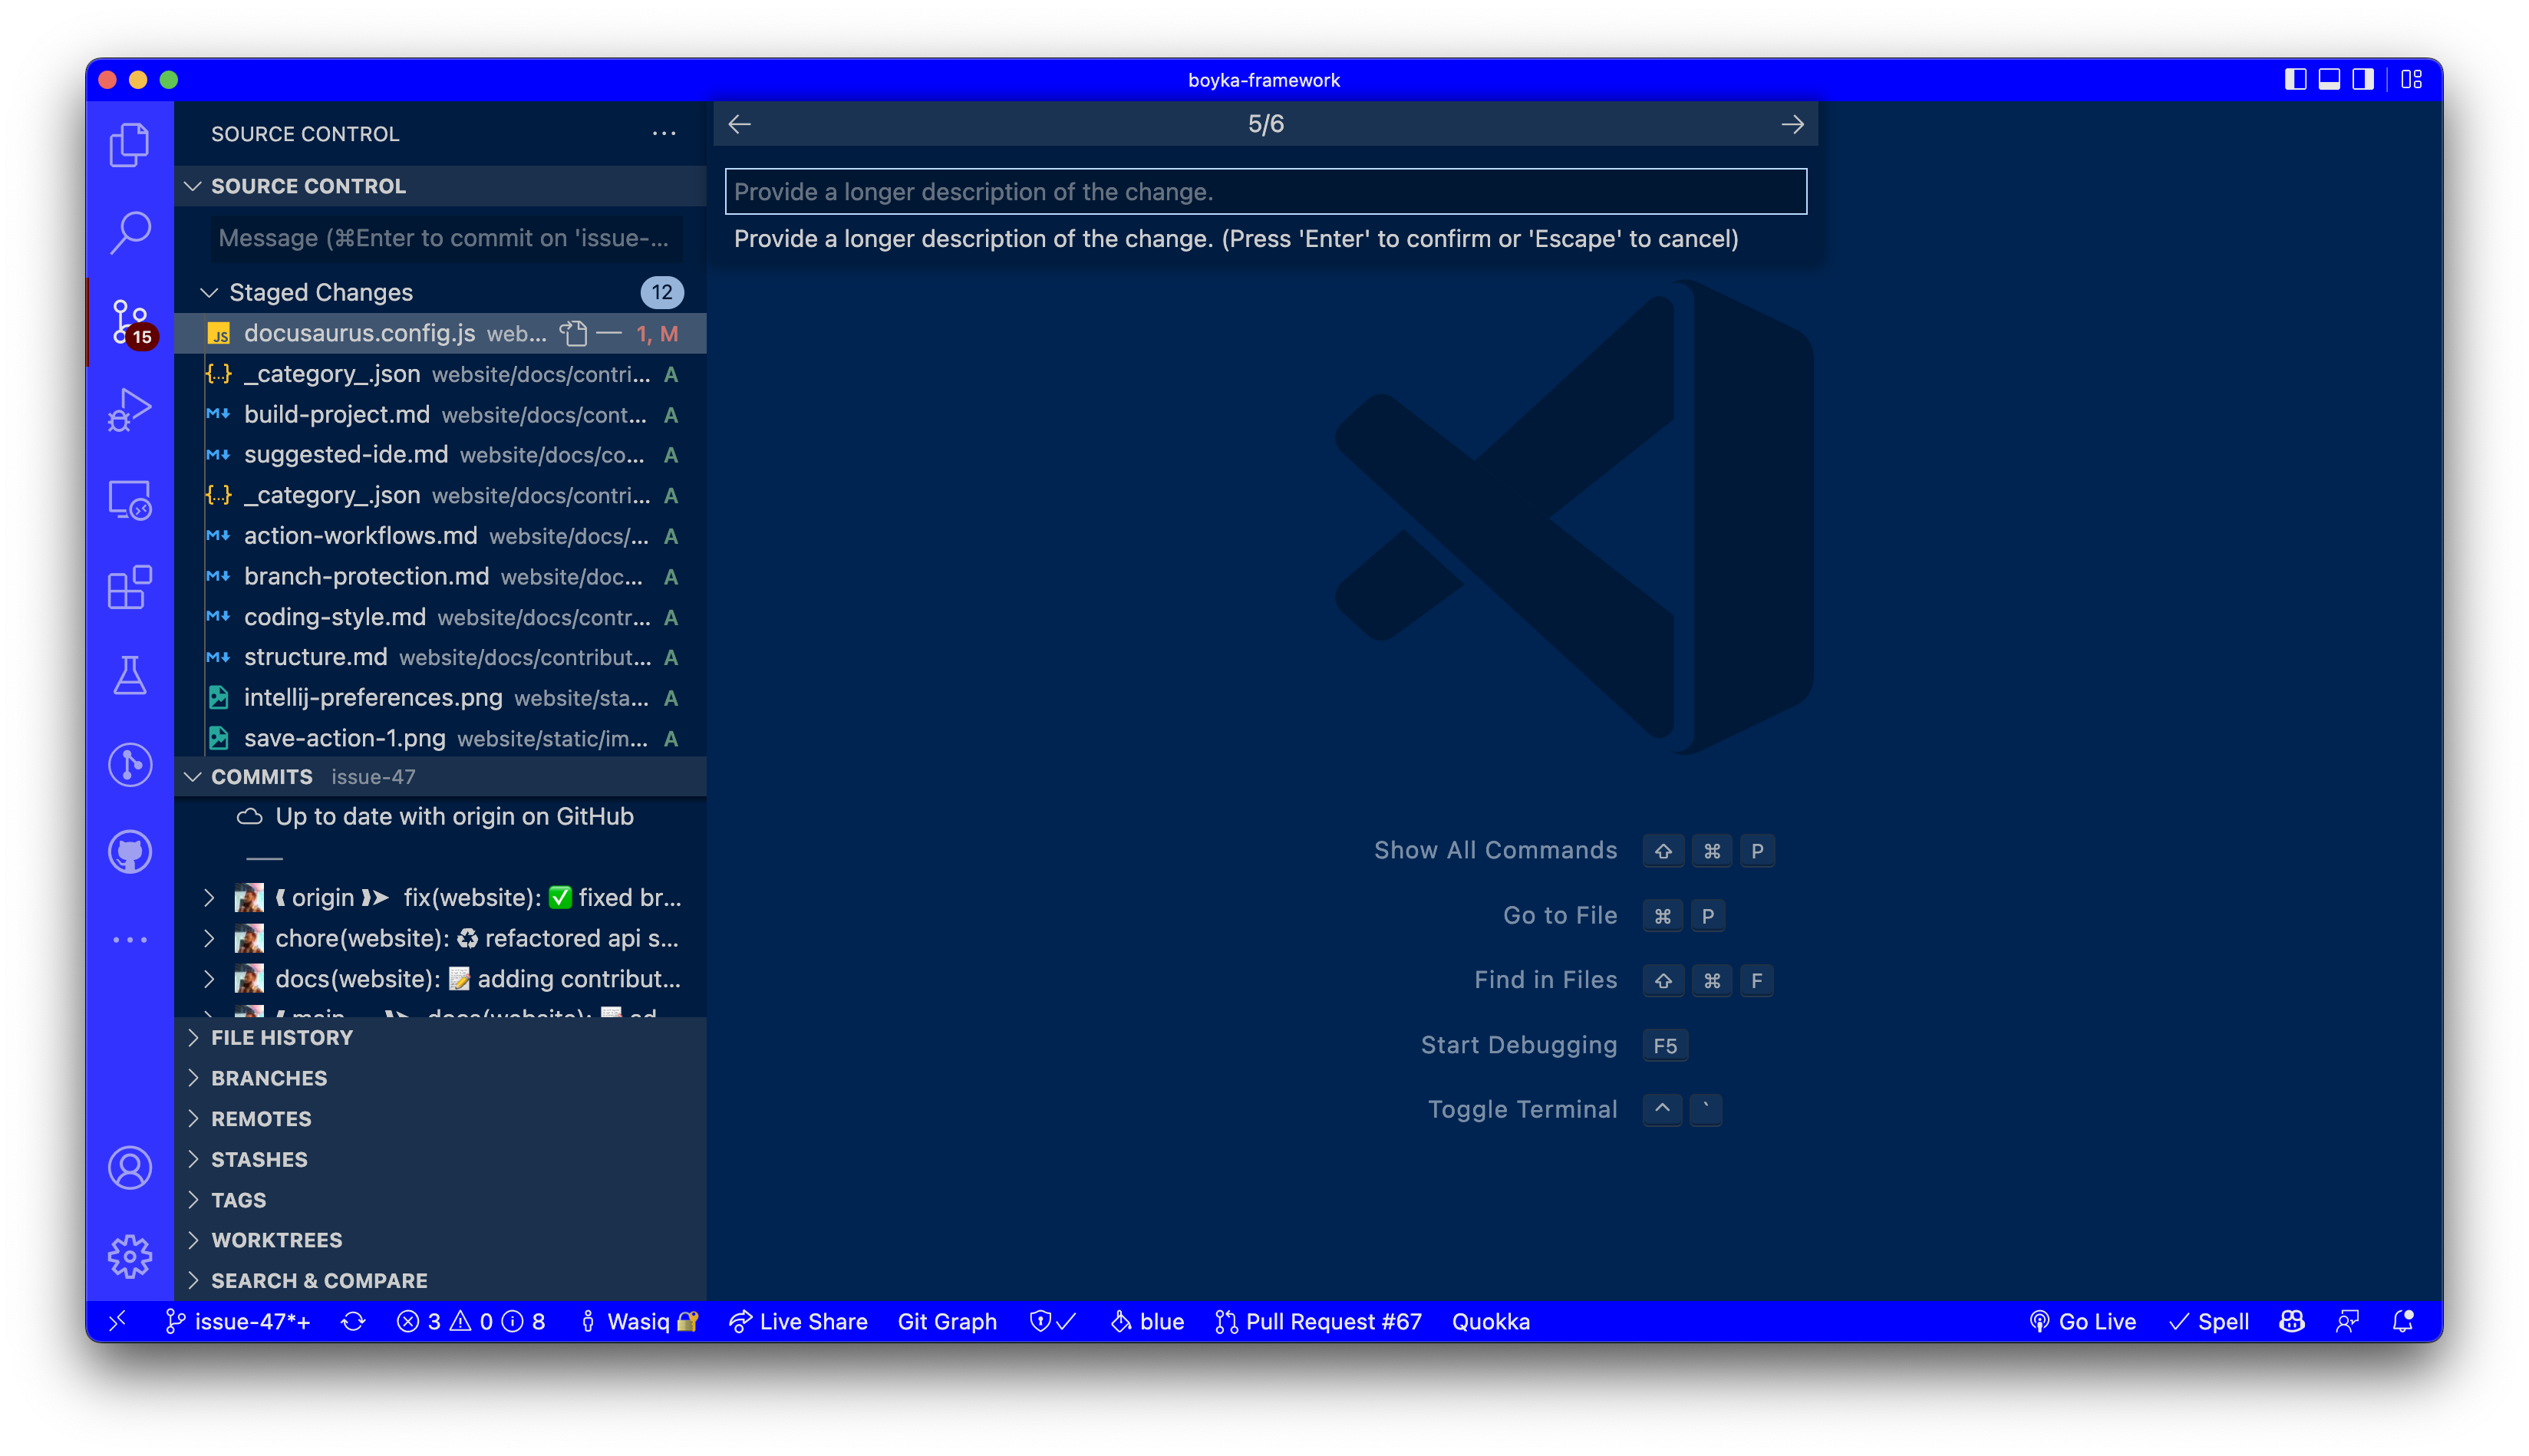
5️⃣ Add long description (optional)
After you write the short description, you will see a text field where you can write a long description of your changes. This is optional, but it is recommended to write a detailed description of your changes.
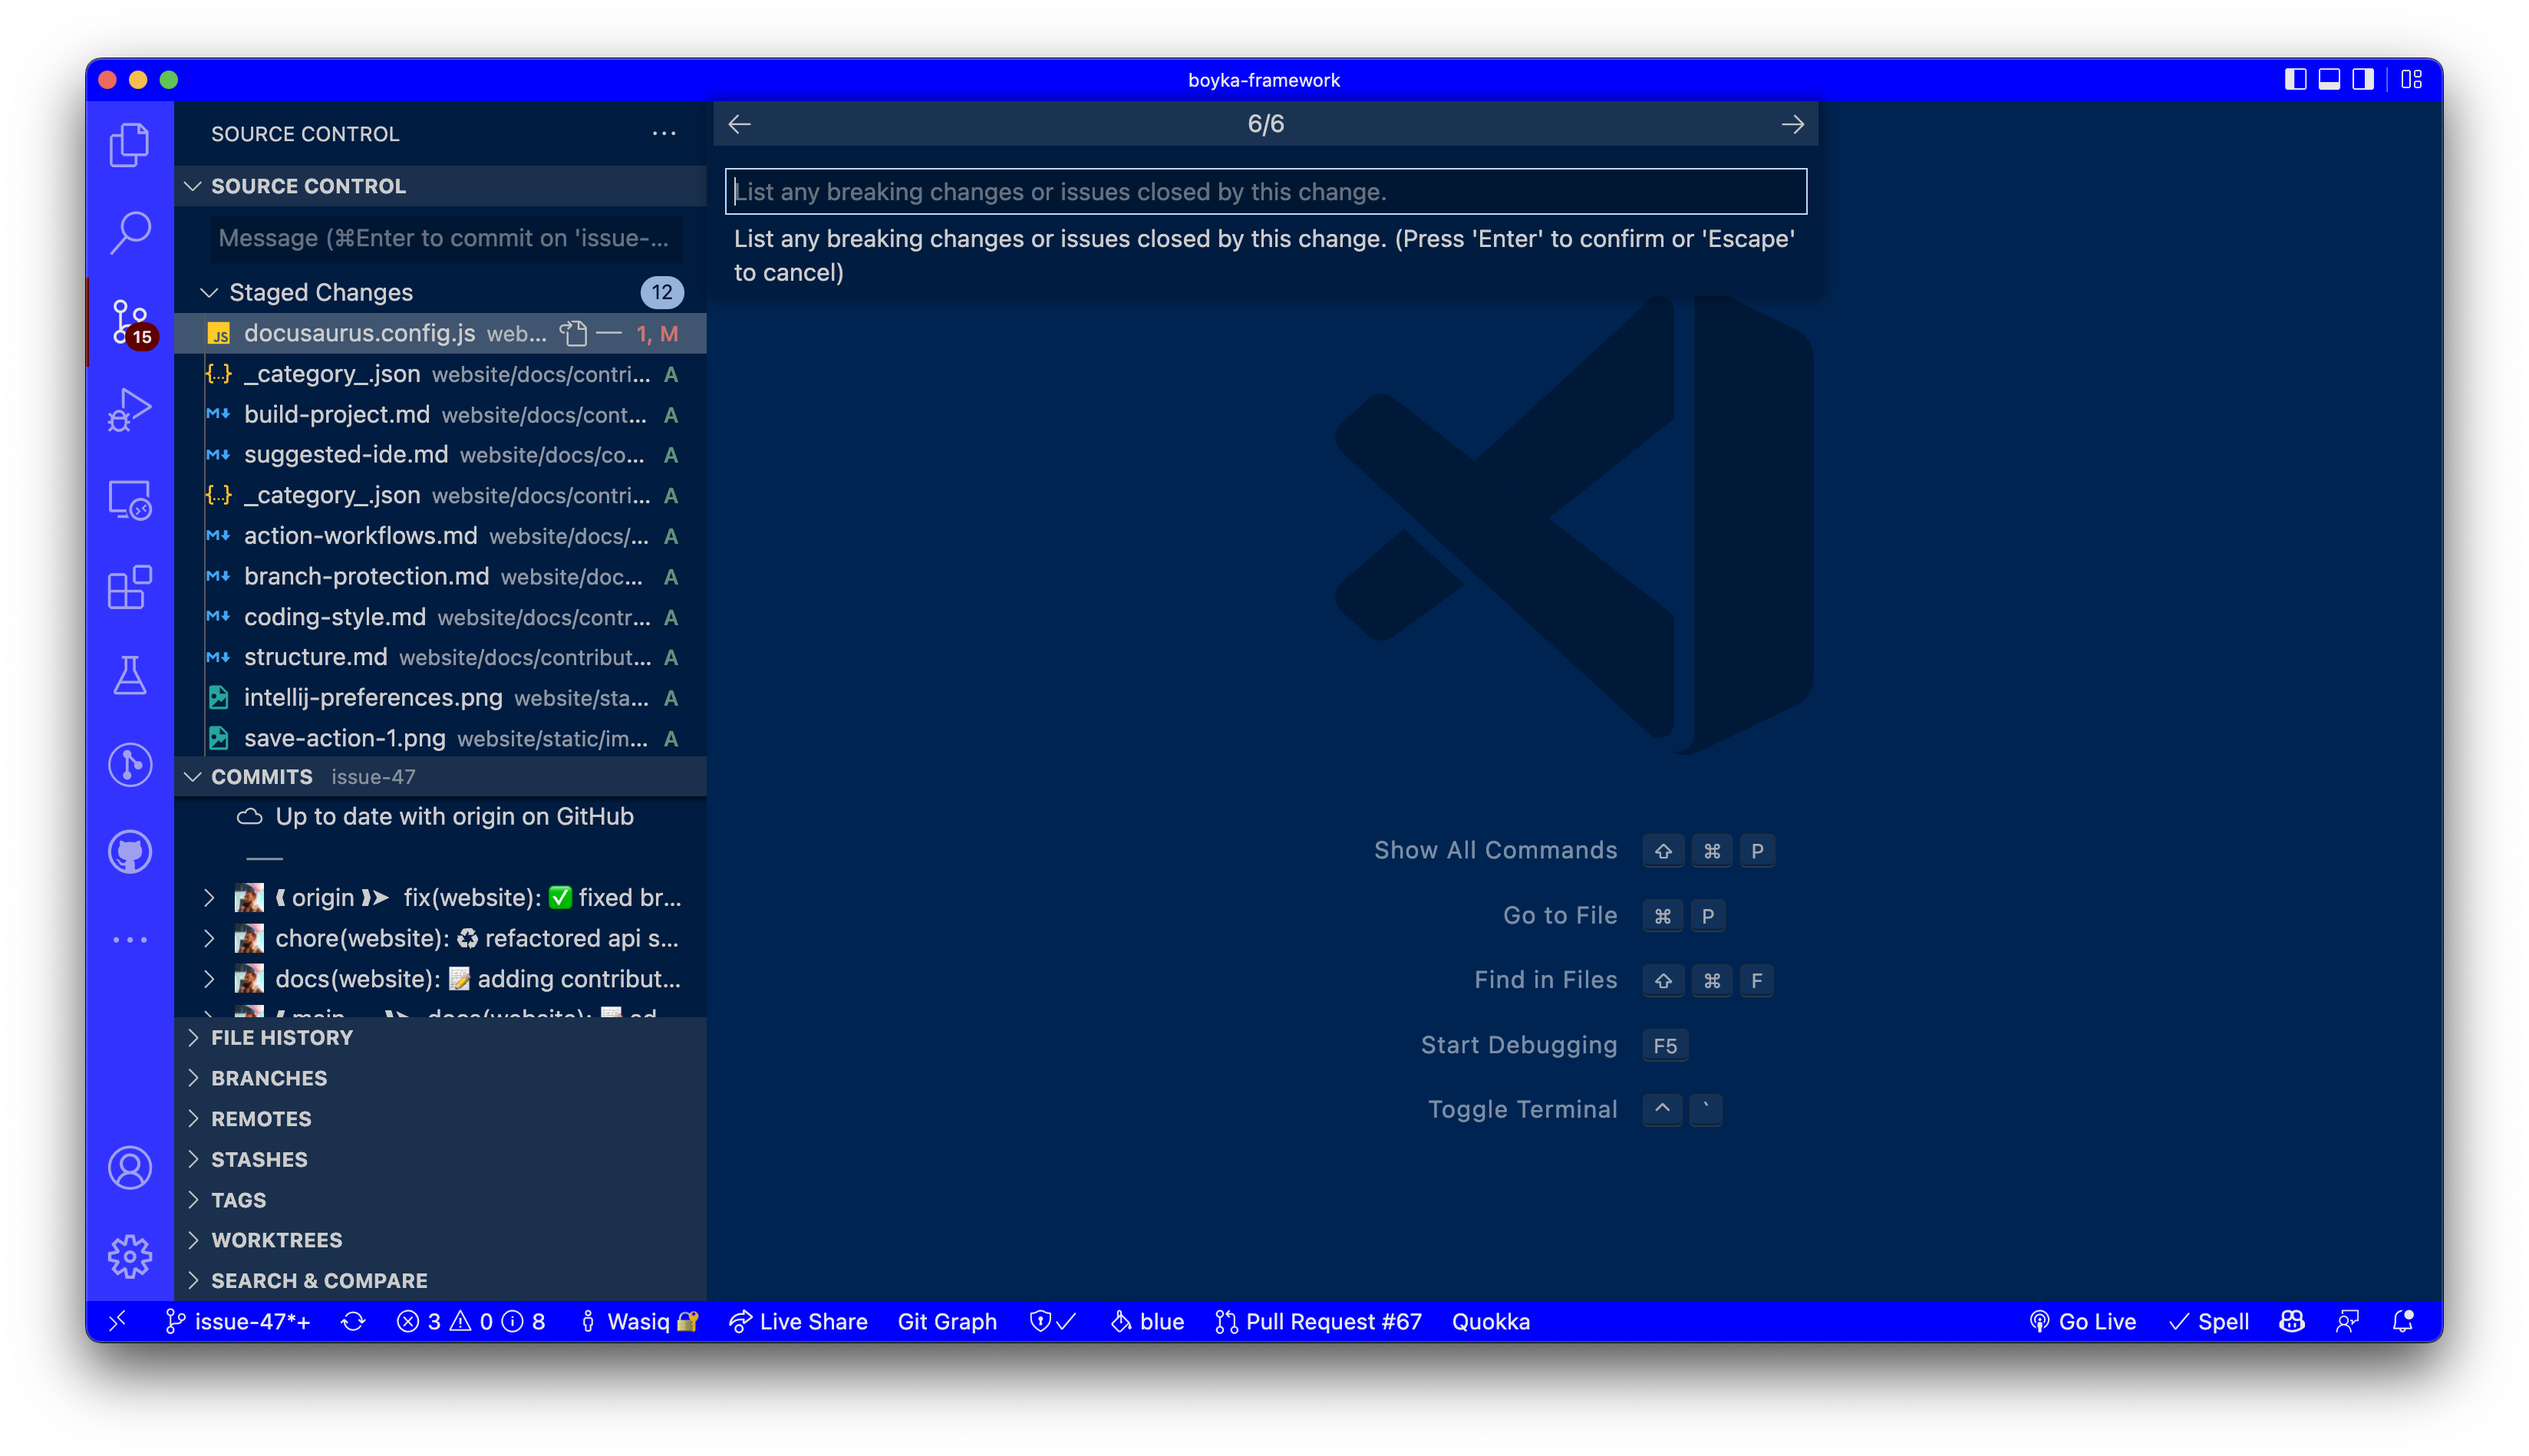
6️⃣ Add breaking changes details (optional)
After you write the long description, you will see a text field where you can write a detailed description of the breaking changes. This is optional, but it is recommended to write a detailed description of the breaking changes.
Make sure to append the BREAKING CHANGE: tag before the description.
5️⃣ Commit the changes
Once the commit message is built, you can copy it and paste it on the terminal and commit using the following command:
> git commit -m "<copied-message>"
6️⃣ Pre-commit checks
When you try to commit using the command in previous step, pre-commit checks will get triggered.
Following checks will happen when you commit:
- Commit message lint to check if the commit message is in correct format
- ESLint to check if the website code complies with the ESLint rules. It will only run if there is change to
.js,.jsx,.tsor.tsxfiles. - Prettier to check if the website code complies with the Prettier rules. It will only run if there is change to
.js,.jsx,.tsor.tsxfiles. - Build the documentation website to check if the website builds successfully.
- Build and run check styles from the Java project to check if the check style and code compilation is successful.
7️⃣ Push your commit
You can push your changes from the Terminal by executing the following command:
> git push
Or, from VSCode, you can click on the Push button in the source control tab.
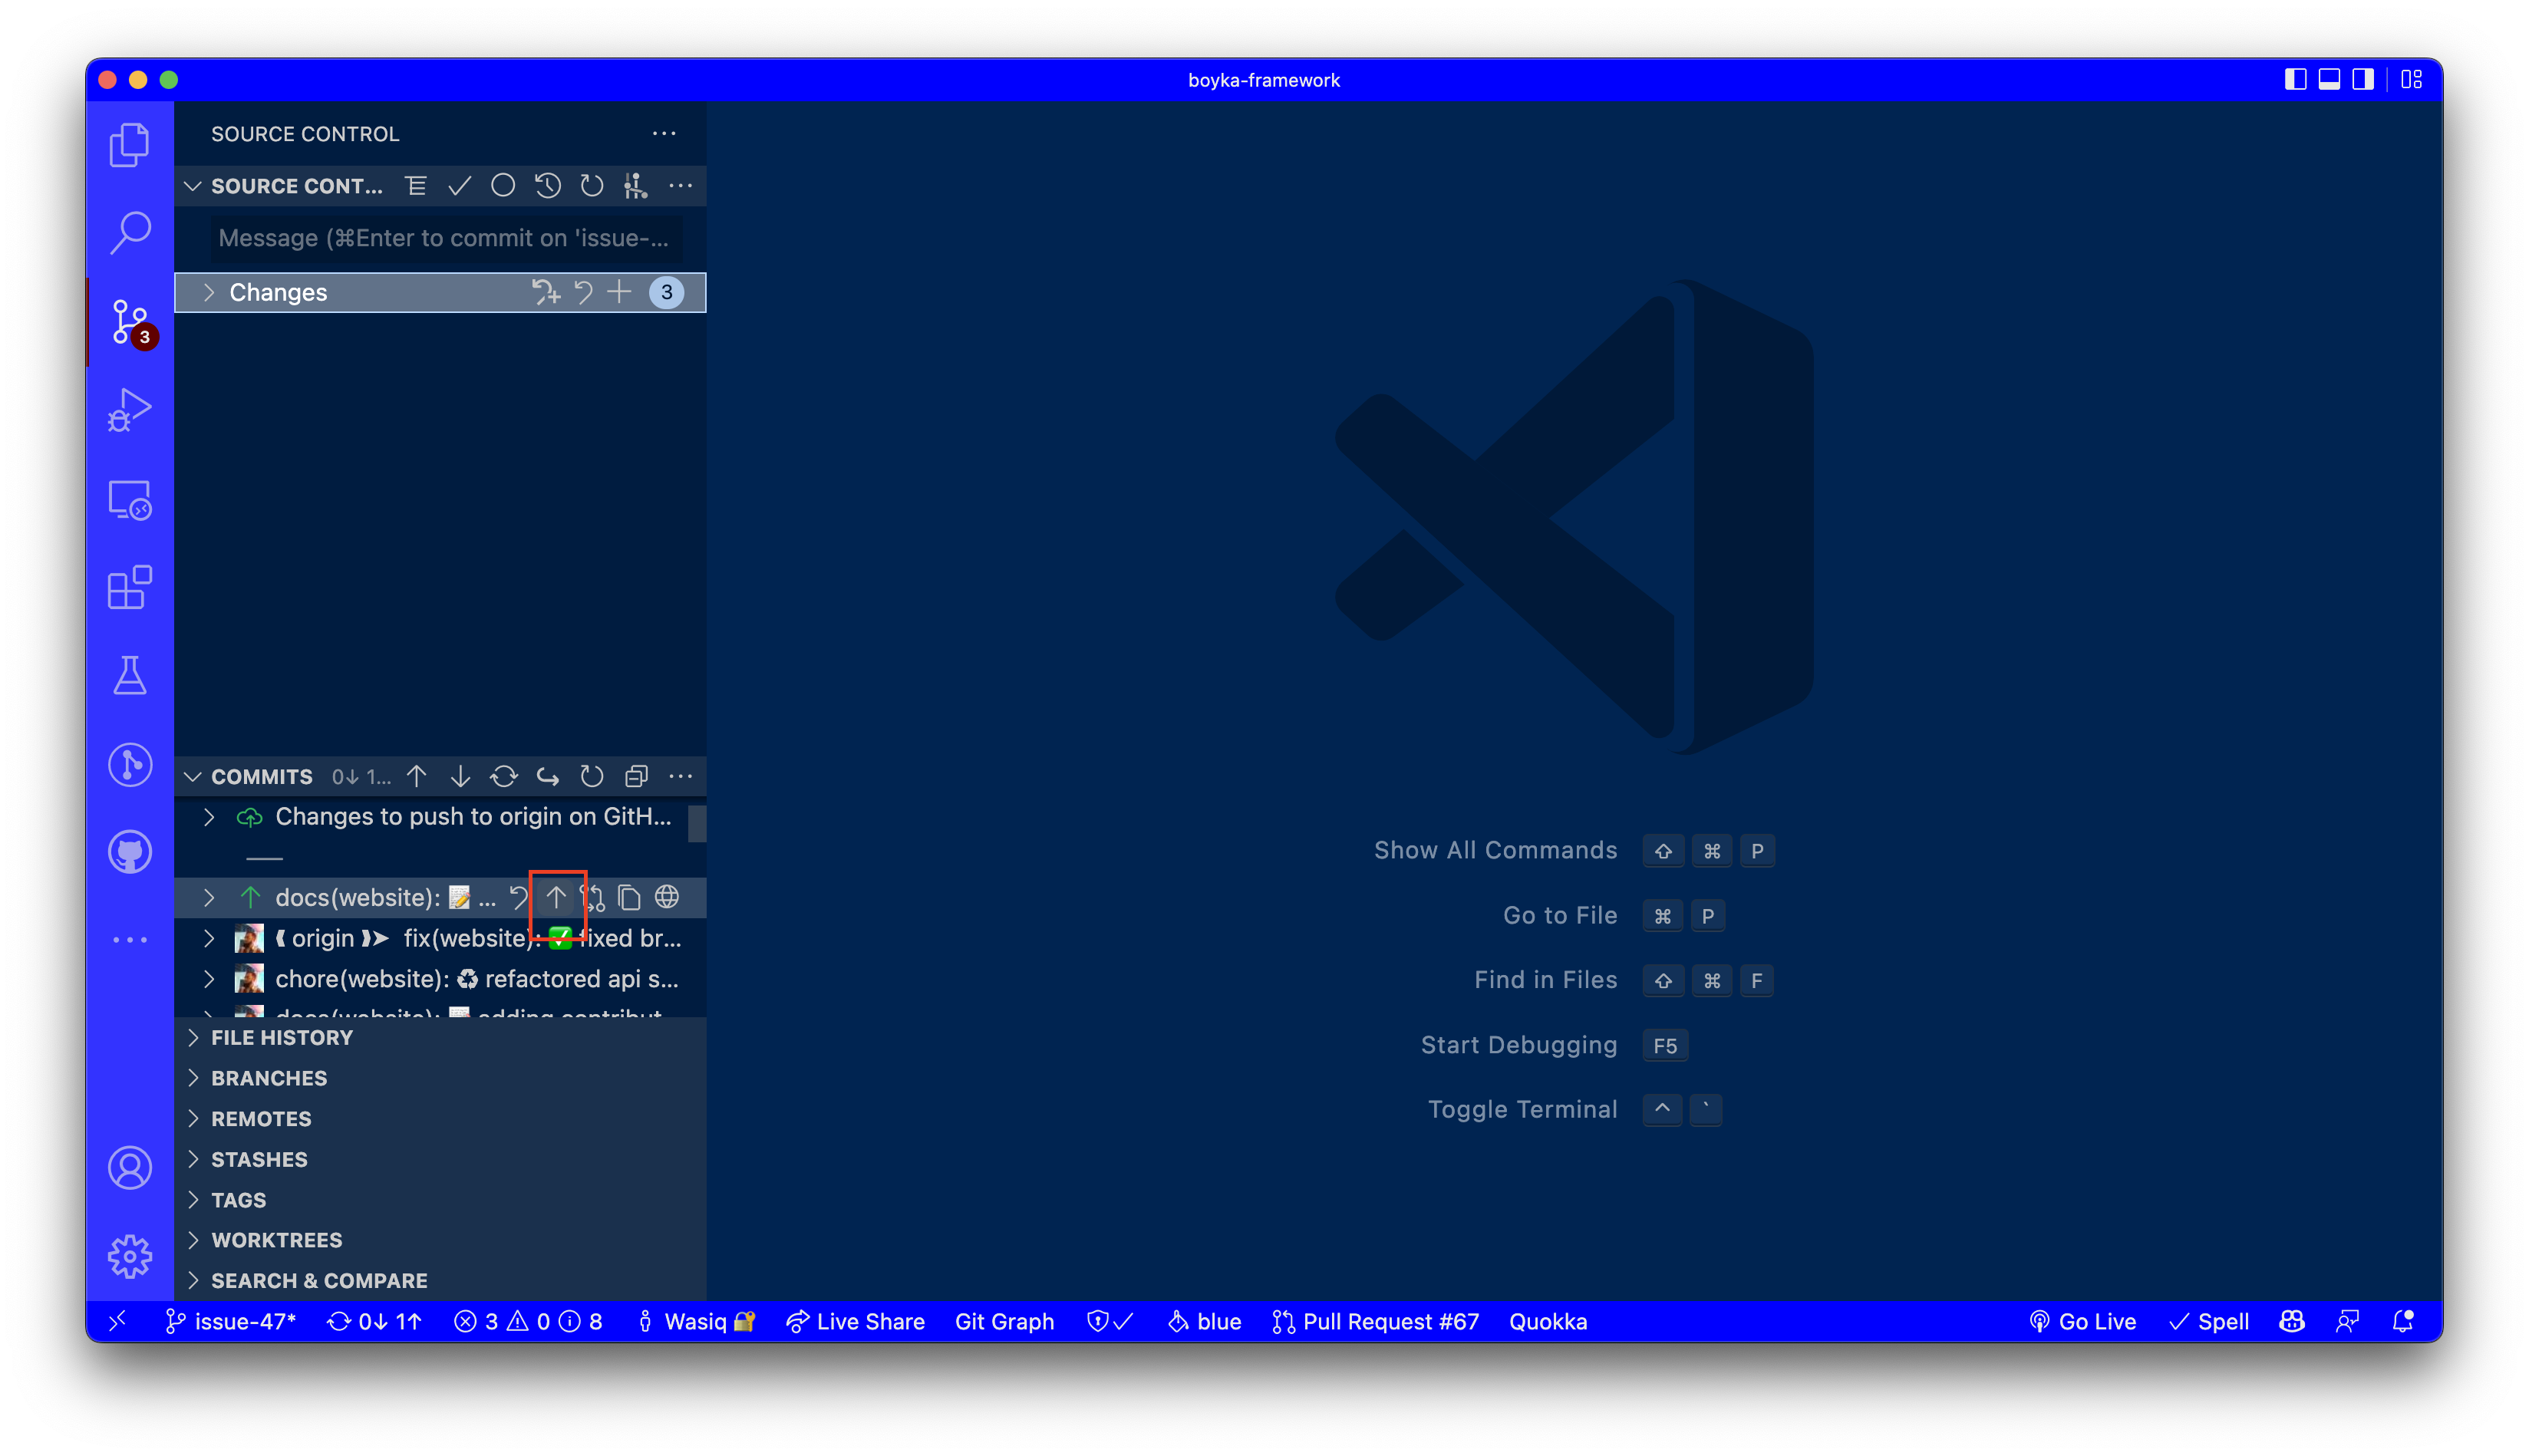
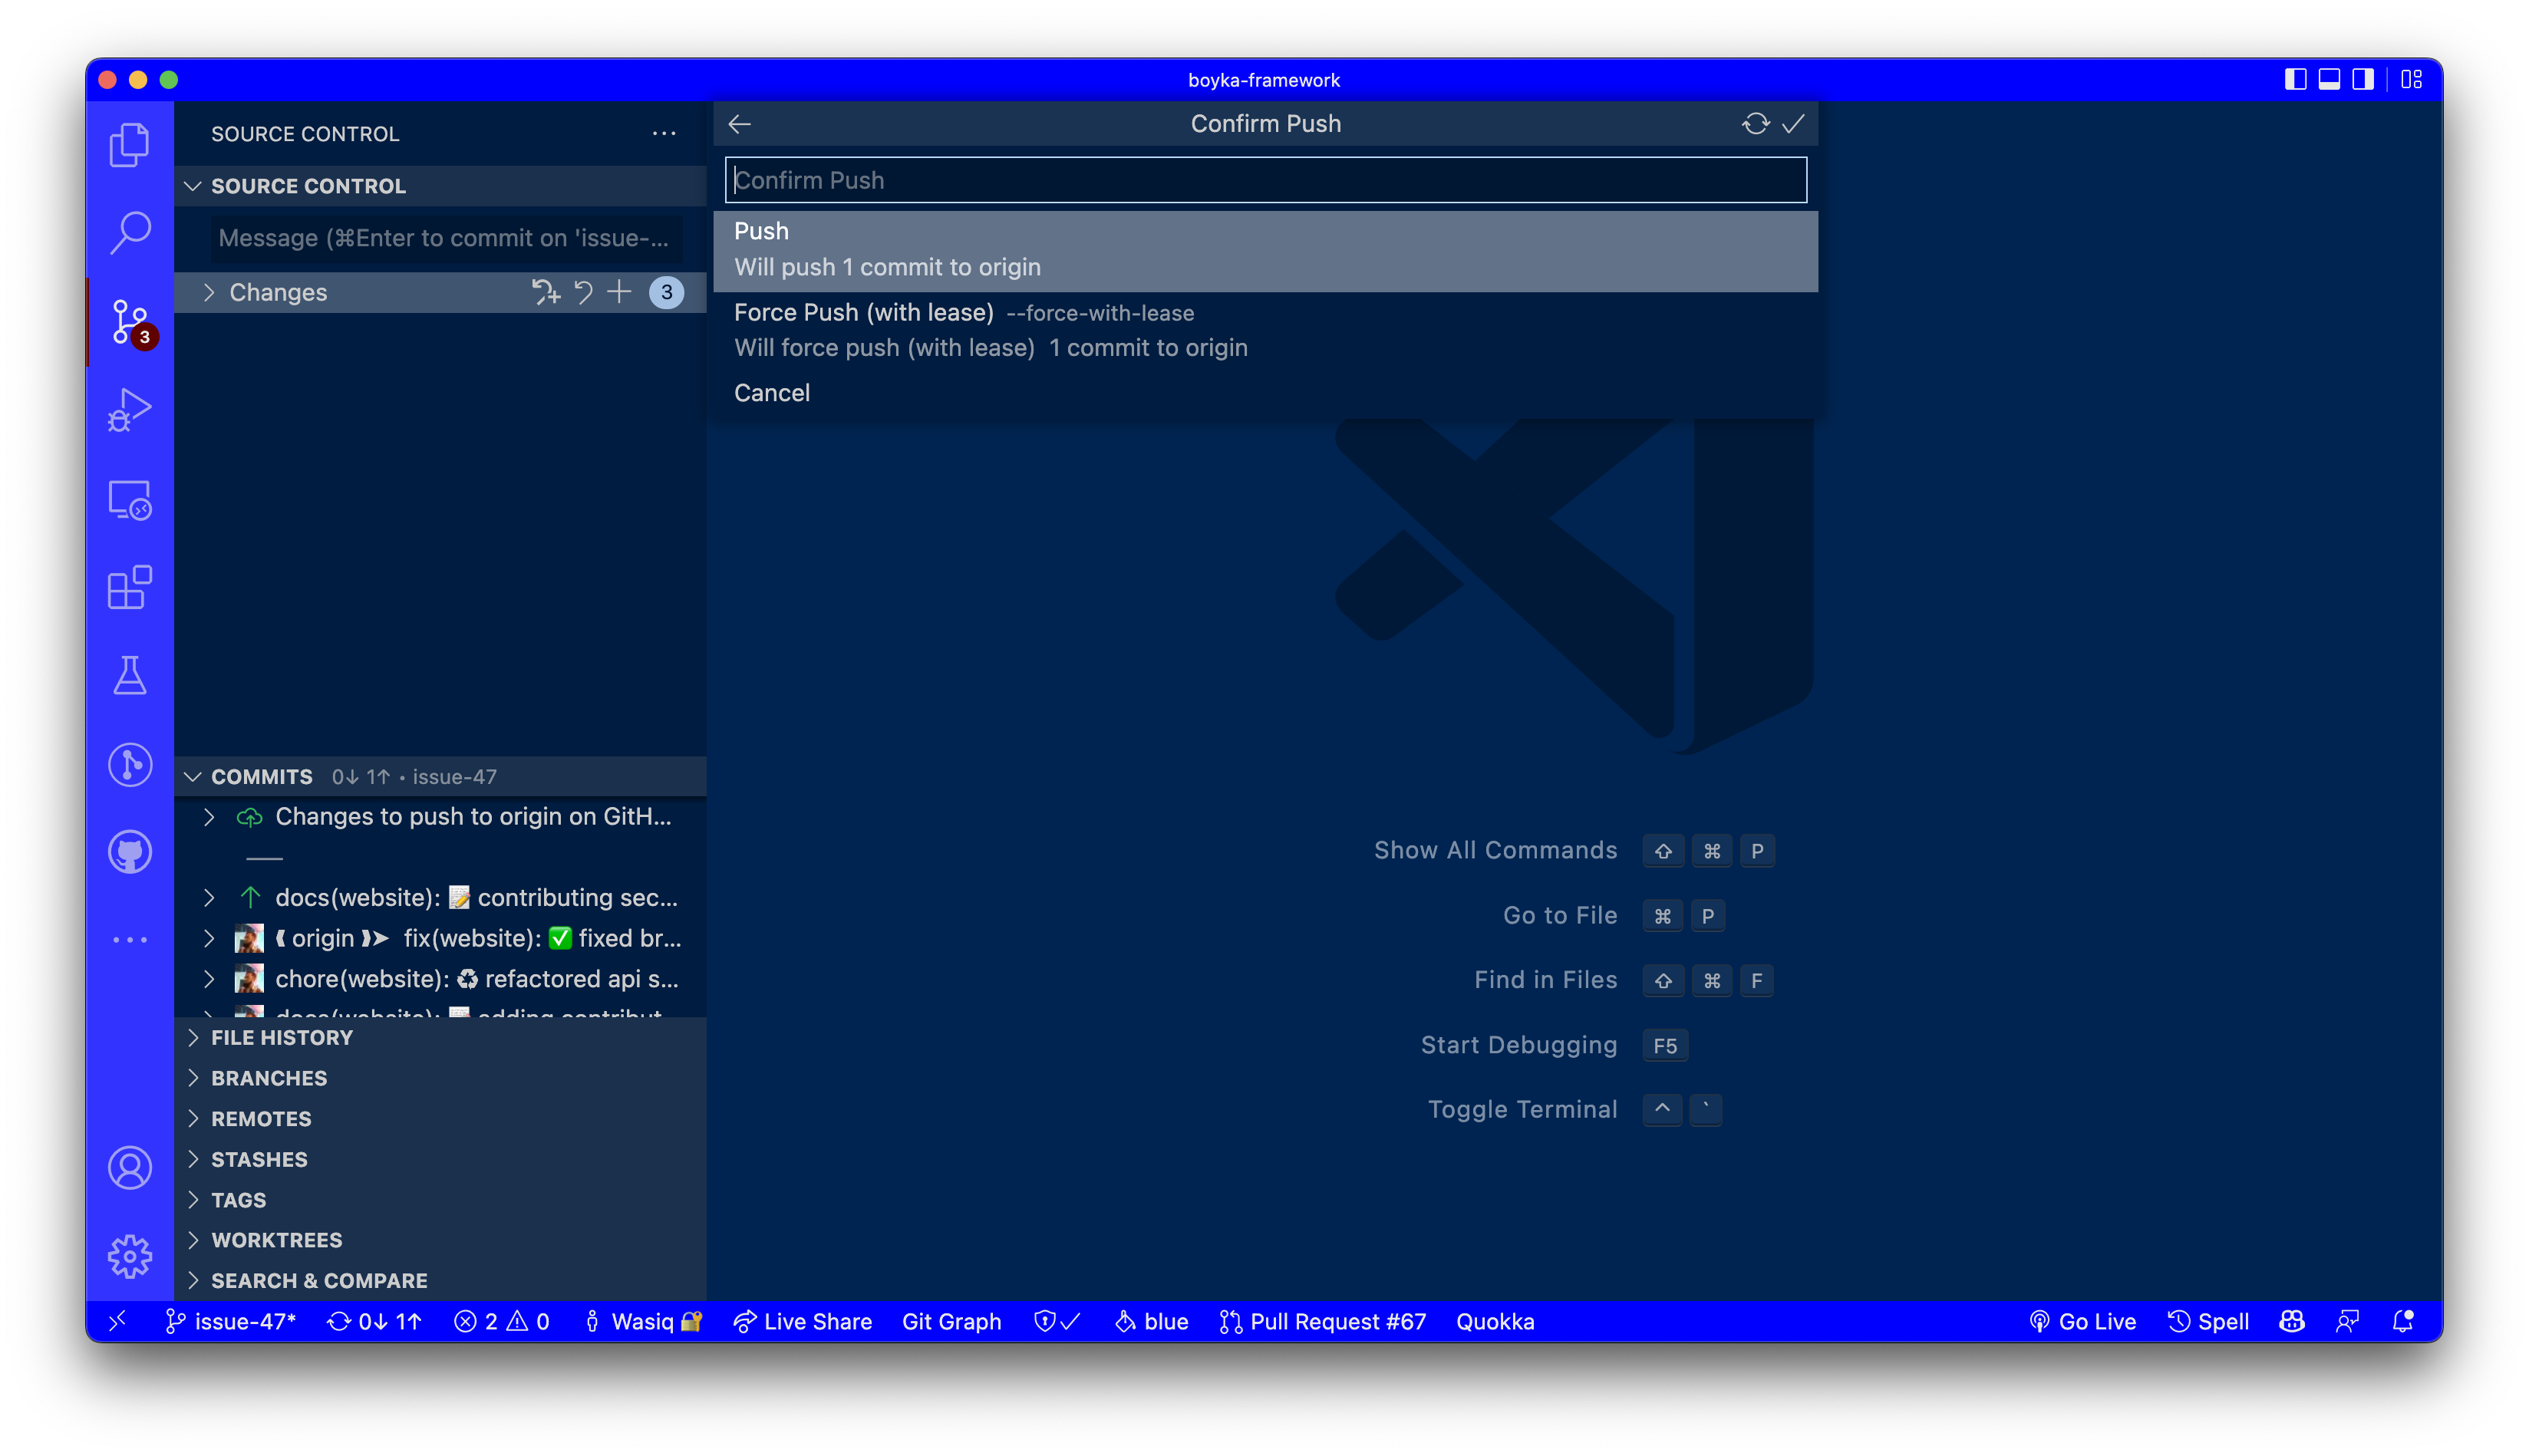
When you click on the Push button, you will see a pop-up asking you to confirm your push.
8️⃣ Create draft PR
As soon as you push your commit, you must create a draft PR on GitHub. Because our workflows will only get triggered on PR's that are raised against main branch.
9️⃣ Ping on Discord
Once PR is raised, ping in the #contributor-discussion channel on our Discord server to let all the contributors know and you can schedule a demo with the contributors to showcase your changes.