1️⃣ Create your first Boyka Framework project
Install Boyka Framework command line interface (CLI)
To create a new Boyka project, you need to install the Boyka CLI. You can do this by running the following command:
npm install -g @boykaframework/boyka-cli
Create a new Boyka project
Once you have installed the Boyka CLI, you can create a new Boyka project by running the following command:
boyka init my-project
Checkout the screenshot below for a visual representation of the command:
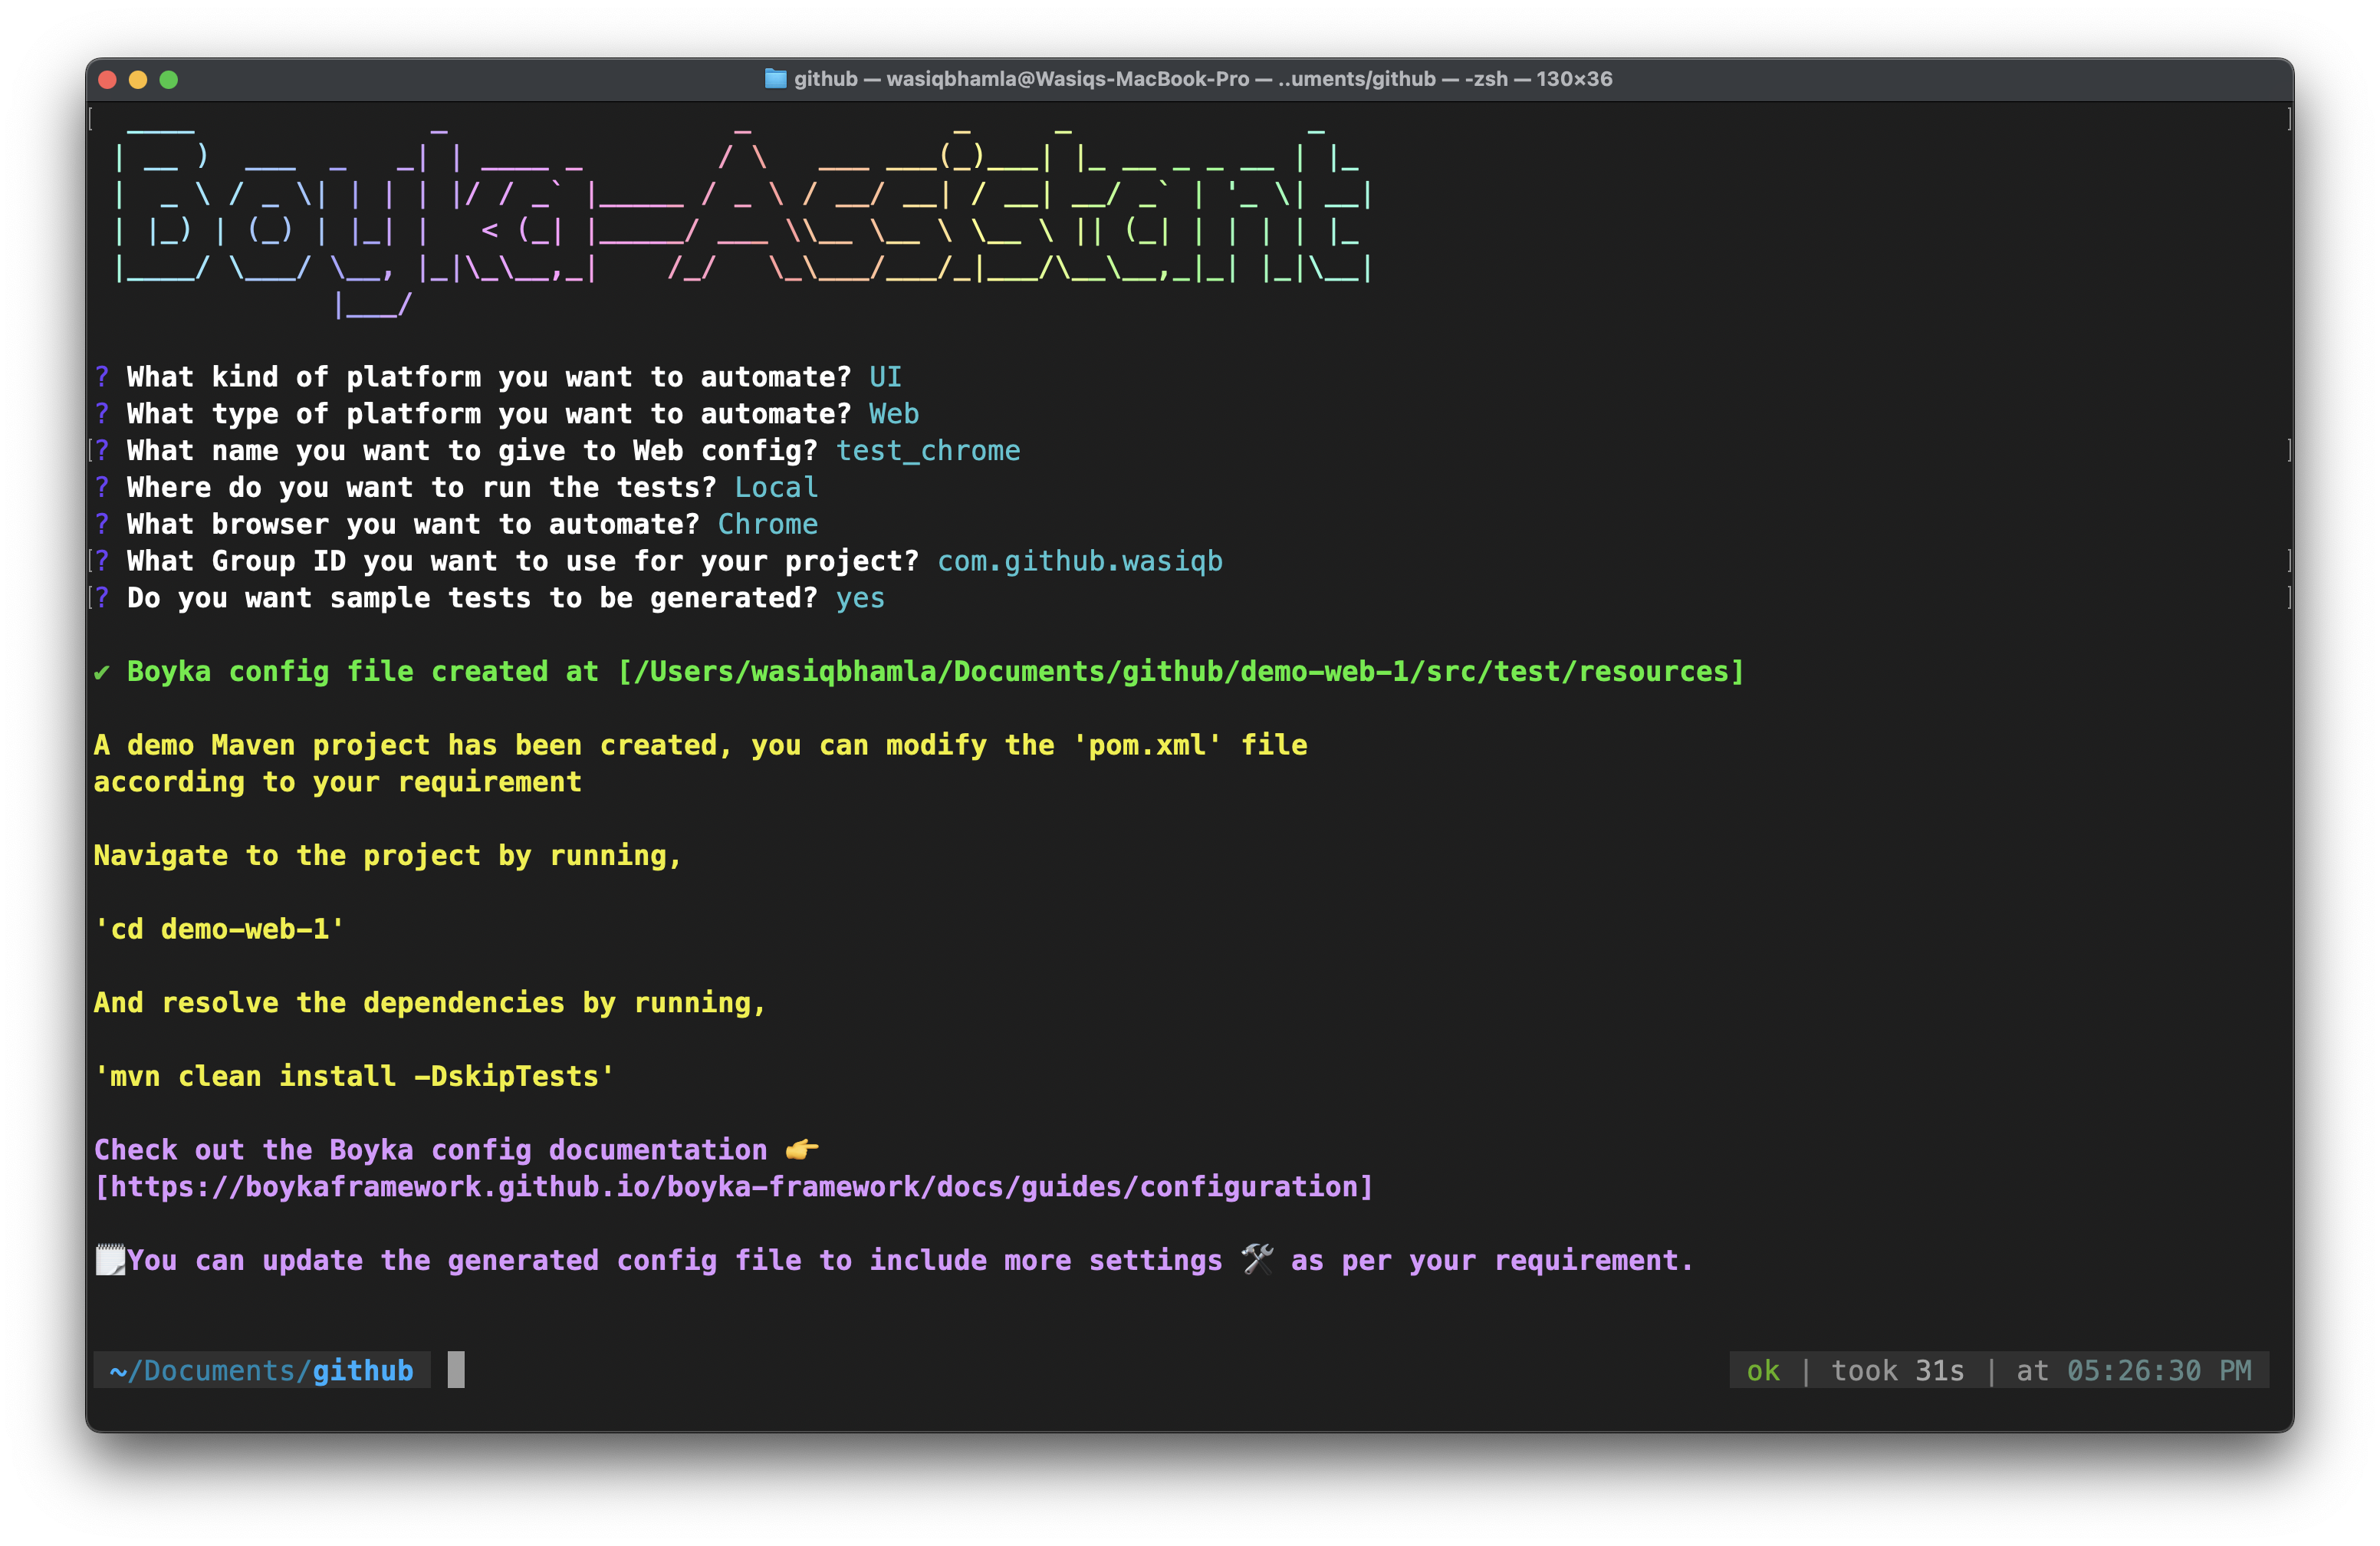
This is just a sample command where I have selected UI as the platform and Web as the type. You can select any platform and type based on your requirements.
This will create a new directory called my-project with the basic structure of a Boyka project.
Answer the questions asked by the CLI to set up your project. The CLI will create a new directory with the name you provided and generate the necessary files and folders for your Boyka project.
You can replace my-project with the name of your project.
Open the project in IntelliJ IDEA
After the project is created, you can open it in your favorite IDE. For this tutorial, we will use IntelliJ IDEA.
- Open IntelliJ IDEA.
- Click on
Openin the welcome screen. - Navigate to the directory where you created your Boyka project and select it.
- Click
OKto open the project. - IntelliJ IDEA will automatically detect the project structure and set up the necessary configurations.
- You need to install Lombok plugin in IntelliJ IDEA to use the Boyka Framework. You can do this by going to
File>Settings>Pluginsand searching forLombok. Install the plugin and restart IntelliJ IDEA. - Now, build the project by going to
Build>Build Projector by pressingCtrl + F9. This will compile the project and generate the necessary files. - When prompted, select
Enable annotation processingto enable Lombok support in your project.
What is included in the Sample test suite
The Boyka project comes with a sample test suite located in the test-suites directory. This test suite includes a sample test case that demonstrates how to use the Boyka Framework for testing.
Sample Web test case
The sample test case automates the login page of The Internet Herokuapp website. It demonstrates how to use the Boyka Framework to interact with web elements, perform actions, and verify results.
Sample API test case
The sample API test case automates the Restful Bookstore API. It demonstrates how to use the Boyka Framework to send HTTP requests, handle responses, and perform assertions.
Sample Mobile test case
The sample mobile test case automates the WebDriverIO demo app. It demonstrates how to use the Boyka Framework to interact with mobile elements, both Android and iOS, perform actions, and verify results.
Run the project
To run the Boyka project, you can right-click on the sample suite xml file (e.g., test-suites/sample.xml) and select Run 'sample'. This will execute the test suite and display the results in the console.